XCMS说明书(英文版)
Last Update: 21 JUL 2011
XCMS Online Usage Instructions
Overview
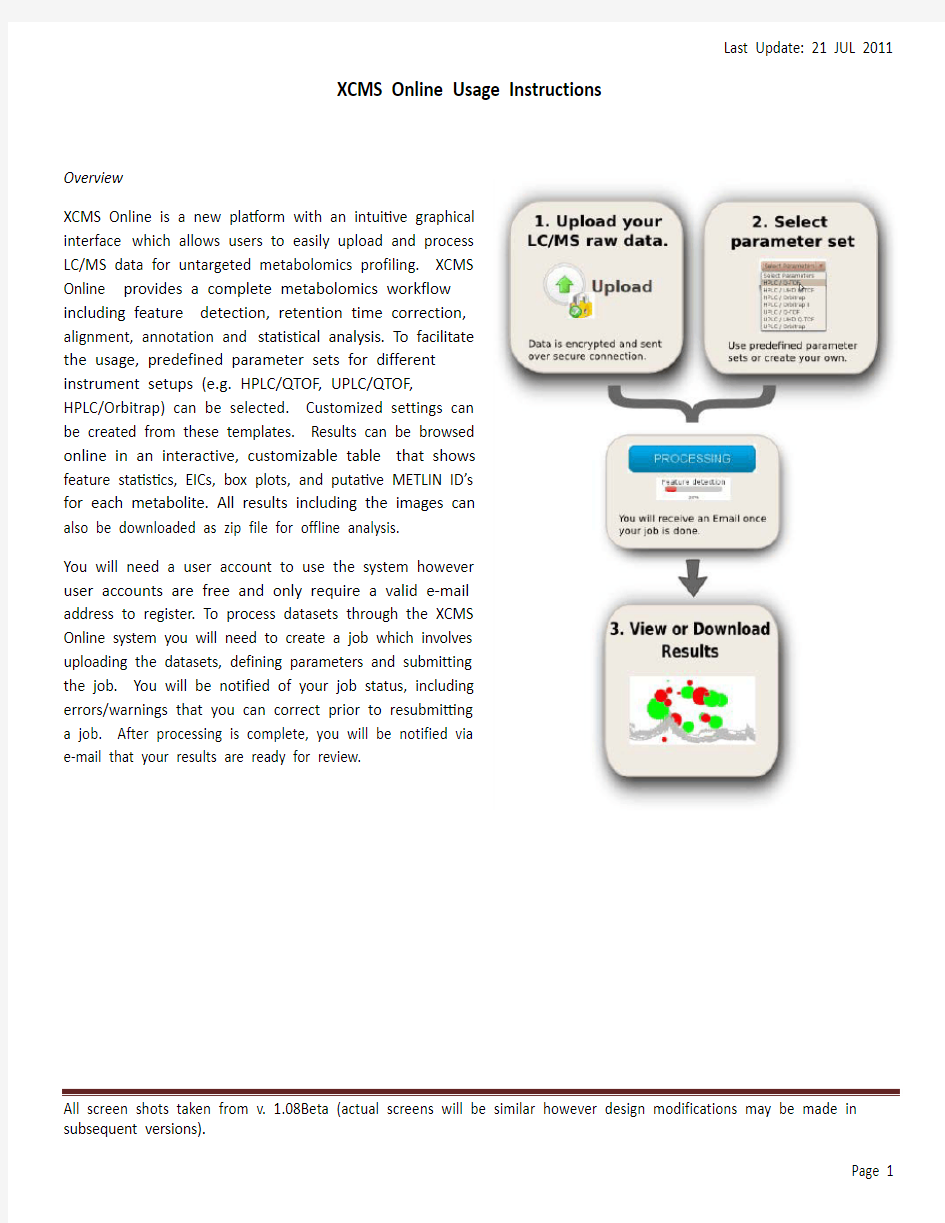
XCMS Online is a new platform with an intuitive graphical
interface which allows users to easily upload and process
LC/MS data for untargeted metabolomics profiling. XCMS
Online provides a complete metabolomics workflow
including feature detection, retention time correction,
alignment, annotation and statistical analysis. To facilitate
the usage, predefined parameter sets for different
instrument setups (e.g. HPLC/QTOF, UPLC/QTOF,
HPLC/Orbitrap) can be selected. Customized settings can
be created from these templates. Results can be browsed
online in an interactive, customizable table that shows
feature statistics, EICs, box plots, and putative METLIN ID’s
for each metabolite. All results including the images can
also be downloaded as zip file for offline analysis.
You will need a user account to use the system however
user accounts are free and only require a valid e-mail
address to register. To process datasets through the XCMS
Online system you will need to create a job which involves
uploading the datasets, defining parameters and submitting
the job. You will be notified of your job status, including
errors/warnings that you can correct prior to resubmitting
a job. After processing is complete, you will be notified via
e-mail that your results are ready for review.
Quick Start
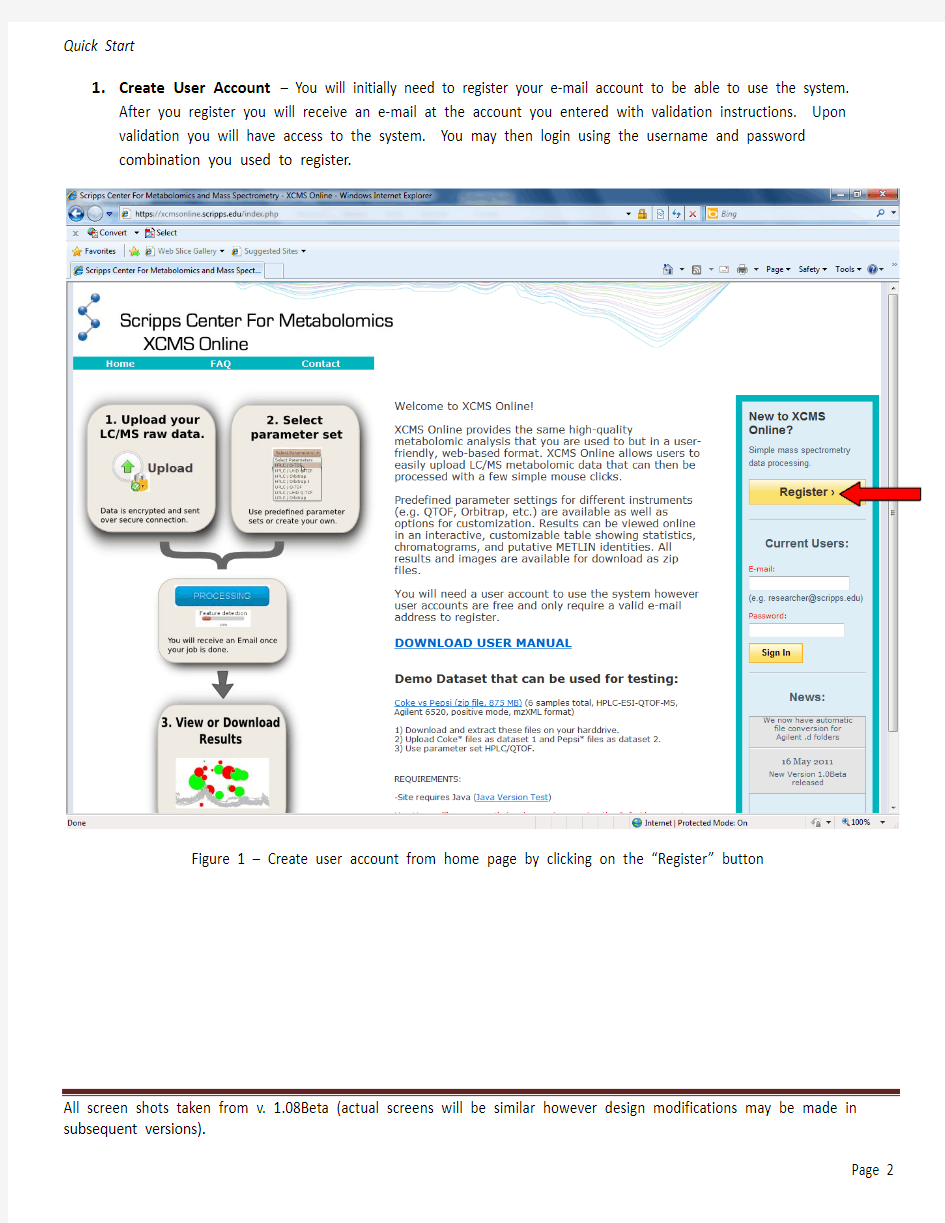
1. Create User Account – You will initially need to register your e-mail account to be able to use the system.
After you register you will receive an e-mail at the account you entered with validation instructions. Upon validation you will have access to the system. You may then login using the username and password combination you used to register.
Figure 1 – Create user account from home page by clicking on the “Register” button
2.Create Job– As a first-time user, you will want to begin by creating a new job. Click on “Create Job” in the top
navigation menu (Figure 2)
Figure 2 – Create New Job by clicking on “Create Job” in the top navigation menu
3. Uploading the Datasets - The create job page will open and you will be able to start defining the job (see
Figure 3). There is a step navigation wizard directly below the top navigation bar that will serve as a guide. Upon initial load, a default job name will be created based on your user name and the current date. You may click the job name to edit.
Upload Dataset 1
Initially you will need to upload a dataset. Dataset 1 (left-hand side) is often defined as the control data set. a) Click the “Upload Dataset” button to initiate an upload. This will load the Java module which is required for
large uploads. Even if you receive a warning (see Appendix A – Figure A1), click “Run”. After the applet runs, you will be presented with an upload dialog box (see Figure 4).
Figure 3 – Initial job creation page
Click job name to edit
Upload Dataset
b)Select files/folders to be included in the dataset from the file tree (Figure 4). Individual files will appear in
the file list as you navigate the file tree. After you locate the files for this dataset, drag them to the “Drop Files Here” area (lower-right) and they will immediately start compressing. Alternatively you can click the “+” symbol (see “Add Files” in Figure 4) to select the files you want to include. When you are satisfied all files are included in this dataset, you may press the “Upload” button to start the upload. The animated line under a file or folder appears during file zipping. You may need to wait until zipping finishes prior to clicking the upload button.
Note: Valid files the system can accept include mzXML, mzData, mzData.XML, netCDF,CDF and folders with “.d” extension (Agilent) at present. Additional formats may be included in future versions. (See Appendix B for more information)
c)Depending on the speed of your Internet connection, you may choose to continue with the job setup. At
this point you can minimize the upload in progress and continue. Alternatively you can drag the upload
dialog box to another part of the screen so you can access the main create job page. The yellow minimize button can be found in the upper-left corner of the upload dialog (Figure 4).
Note: If you close the dialog box, you will need to start again.
Minimize button (orange)
File List
Add Files
File Tree
Figure 4 – Upload Dataset Dialog
Upload Dataset 2
At this point, you can repeat step number 3 to begin the second dataset upload. The Dataset 2 section can be found to the right of the Dataset 1 section.
Note: You must have unique names for each dataset (even if the id is different). You can modify the dataset names after an upload has started by clicking the “Edit” button to the right of the respective dataset name
(Figure 5).
Figure 5 – Screen after uploads are complete Modify Dataset name
Define Parameters
4.Select Parameter Set - After uploads are defined (still in progress or complete), you have to define the
parameters that correspond to this job. Some template parameter sets (e.g. HPLC/TOF, UPLC/TOF,
HPLC/OrbiTrap) have been predefined. You can simply select one of those predefined parameter sets or customize them to your particular needs. To begin defining parameters, click on the Parameter drop down box (Figure 5). After you select a template, the dropdown will change and you will be able to view or edit the selected parameter set (Figure 6).
4a. Define Custom Parameters -skip this step if you do not wish to define custom parameters- If you select the “View/Edit” button to view the parameter set you will be presented with a modal dialog box where you can define how the datasets are processed. Methods and properties are available for all aspects of dataset processing. Note: If you choose to change any of the settings in a template parameter set, you will need to create a new parameter name for processing ( Figure 6). Otherwise your changes will not be saved as you can not overwrite a template parameter set. The name for a custom parameter set can be set in the “General” tab.
Save Custom Parameters
Figure 6 – View/Edit Parameters for Job
5.Submit the job! - At this point you can review all relevant details about the job prior to submission (e.g. job
name, dataset names, correct file count, correct parameters). Once you are satisfied, click the “Submit Job”
button to queue the job for processing. The “Submit Job” button can be found at the bottom of the screen (Figure 6).
Note: Even if you still have datasets uploading, you can pre-submit the job so it will automatically queue once the datasets complete the upload.
View/Edit Parameters Job Submit button
Figure 6 – Screen after parameter selection
After you click “Submit Job”, you will have a final opportunity to view all settings for this job prior to submission.
A modal dialog box will appear on your screen (Figure 7) with job settings. Carefully review the information as this cannot be changed after submission (You would need to create a new job – although your data sets will already be stored). If you are satisfied with the displayed information, click the “Submit Job” button in the lower-right corner of the dialog box, otherwise click cancel and make the necessary changes.
Note: It is important to not close the browser if you have uploads in progress as these will cancel. There is a timer on the page that will automatically redirect the entire page to the “View Results” section when all uploads are complete. In addition, you will receive an e-mail when your job has successfully queued.
Job Submit button
Figure 7 – Job Confirmation Dialog
View Results
After you submit your job, you will be forwarded to the “View Results” page where you can see details of your submitted jobs, including progress percentage, datasets used and parameter set used. The page will automatically refresh if you have pending jobs however you will receive an e-mail when each submitted job is complete. Once complete, you may view the results by clicking the green “VIEW” button (Figure 8).
1. Click green “VIEW” button on the View Results page
Figure 8 – View Results Page
Click to edit job name
The initial results screen provides a summary of the job details replete with graphs (total ion chromatograms (TIC) before and after retention time correction), retention time deviation vs retention time, log fold change bubble plot and multidimensional scaling (MDS). You can also download the full zipped results using the link at the bottom of the page. Note: This will file will not include any online annotations you input in the feature result table (see next step).
Click to view detailed
information by feature
2.Click “BROWSE RESULT TABLE” button (Fig. 9) to View Feature Details
If this is the first time viewing the feature detail results of the current job, the data will be loaded into the database for viewing and annotating (which may cause a brief delay); subsequent viewing will be faster. As you navigate through each feature (you can use arrow keys), details about each feature (m/z, retention time, EIC, box-and-whisker plot and putative METLIN ID’s) is displayed to the right of the table.
Figure 10 – Detailed Feature Information Page
Frequently Used Features:
? Searching / filtering is available by clicking the magnifying glass icon (upper-right of table) ? You can hide or display specific columns by clicking the icon in the lower-left (See Figure 10) ? Clicking any column header will sort the table in ascending or descending order by that field ? Column order and width can be configured by dragging and dropping column headers
?
Double clicking row or pressing “Enter” will open notes dialog box (information saved in notes column)
Data Management
Currently storage of user data (e.g. uploaded datasets, custom parameters and jobs results, including annotations) is limited (See Account menu for usage). To free space for additional uploads, you will likely need to delete jobs and/or datasets. The check your account storage, navigate to the Account menu (See Figure 11).
Account Menu
Available Storage Space
Figure 11 – Account View
Deleting Jobs:
On the view results page (See Figure 8), you have the option to delete a job (far right column) but the underlying dataset will not be deleted with a single click (as you may wish to create another job with different parameters and compare results). Deleting the actual datasets can be accomplished by following the steps in the section “Deleting Datasets”.
Deleting Datasets:
1.Click on “Stored Datasets” in the top navigation bar to enter the stored datasets area. This page will list all
datasets previously uploaded. From here you may delete the entire dataset by clicking the “X” in the far right column (See Figure 12). A confirmation dialog box will inform you of the impending action and allow you to
cancel. Note: To rerun jobs based on deleted data, you will need to re-upload the data; we cannot retrieve
deleted datasets.
View/Edit Files within
dataset
Figure 12 – Create New Job by clicking on “Create Job” in the top navigation menu
Administering Datasets:
Clicking on the “Edit/View Dataset” button (See Figure 12) will present the dataset edit view (See Figure 13). From here you can remove individual files that were uploaded as part of a dataset. Simply click on the “X” in the far right column. You may also change the dataset name or add comments to be stored with the dataset.
Note: The following actions are planned but not included in XCMS Online as of version 1.05 Beta: ?Adding the same files to multiple datasets (upload once but include in separate datasets – possibly as part of iterative analysis)
?Adding individual files to existing dataset (useful if a single file is corrupted or wrong file was mistakenly uploaded)
?Multiple delete files (selection boxes where a user may want to delete several, but not all, files within a dataset) ?Connection to cloud storage (theoretically unlimited datasets could be stored for a user or lab for indefinite period of time)
Add comments to
Dataset
Figure 13 – Edit Dataset Files
Figure A1 – Java Warning Dialog
Supported file formats
File formats that can be directly uploaded to XCMS Online are:
?mzXML
?mzData
?NetCDF (AIA/ANDI)
?Agilent .d folders
In future versions, additional formats will be directly supported by XCMS Online. In the meantime, the following file formats should be converted prior to uploading them, using the converters shown in the table below.
ProteoWizard Installation
The follow section describes how to download and install ProteoWizard.
1.Create a folder on your desktop (e.g. “pwiz”).
2.Download ProteoWizard from https://www.360docs.net/doc/1c4353698.html,/downloads.shtml and save into the
previously created folder. Important: choose the version “Windows (includes vendor reader support)”.
3.Extract the .tar.bz2 file. You might need an additional program for extraction. 7Zip is free.
There is no installation program. The converter program will be started directly from this folder. For easy usage, you might want to create a symbolic link to “Msconvertgui.exe” in that folder onto your desktop.
ProteoWizard usage
We recommend converting files to mzXML in centroid mode, which saves upload time (smaller files) and will also make sure that the files are compatible with the centWave method for feature detection.
1.Run “Msconvertgui.exe” from within the previously created folder or your symbolic link.
2.
a.Click 'Browse' and select file(s) for conversion.
b.Select mzXML as output format.
c.Select 'Peak Picking' filter (centroidization) and click the 'Add' button.
d.Start the conversion.
说明书英文版
Instructions 1. Specifications for gears assembled The torch is equipped with the following 8 different gears: 2. Operation for switchover ● tail switch operation The tail switch is a button switch with the function of button-pressing for locking and unlocking, which is to realize the operation of internal switches through the metallic button’s delivering the pressing force in the following specific modes: ◆when the switch is off, if the metallic button is pressed hard, after it is released, the switch
will then be kept on, circuit connected with LED on. ◆when the switch is on, if the metallic button is pressed hard, after it is released, the switch will then be unlocked and kept off with LED accordingly off. ◆when the switch is on, if the metallic button is pressed gently, LED will be off immediately, but after the button is released, LED will then be on again, and the switch will then be kept on. This operation is defined as the “gentle pressing” that LED goes through momentary on-and-off as the metallic button is gently pressed and released. ●how to switch over If the torch is turned on for the first time, or turned on again after it is turned off for the first time and remains off or at least 2 seconds, the gear will then be automatically switched to the first gear in either case: “high light”. In the mode that the torch is kept on when LED is on, press the tail switch gently, and the torch will be switched to another gear. The 8 different gears assembled herein will be switched on by turns. Caution: if you have any problem with switchover before initial use, please contact relevant salespeople or the after-sale service department for more information. 3. Load batteries in the right way Unscrew the tail cover, put the batteries into the cabin with the positive electrode toward the torch head, and then screw the cover tight. If batteries are loaded in the wrong way, the torch won’t work due to circuit protection, but it will resume normal work after batteries are unloaded and reloaded in the right way. Caution: batteries with no-load voltage over 2V are not preferred in case the internal circuit suffers from damages. Only batteries with on-load voltage of or under 2V are recommended. Due to excellent discharging performance, NiMH batteries are strongly recommended here. Maintenance Four silicone rings are equipped, two in front of the middle pipe and two at the back, providing excellent water-proof performance. For daily use, the torch will continue normal work even if it is accidentally soaked in the water.
产品说明书英文版V完整版
产品说明书英文版V HEN system office room 【HEN16H-HENS2AHENS8Q8-HENH1688】
X-Link PRODUCT MANUALS FOR MULTIVIEW CONTROLER
This manual applies to the following models: 3UA Multiview CONTROLER ( Optional Front Panal,LCD Console ) 3UB Multiview CONTROLER ( Optional Front Panal,LCD Console ) 8U Multiview CONTROLER ( Optional Front Panal ) 8U-S Multiview CONTROLER( Optional Front Panal ) 12U Multiview CONTROLER LED Very-large Dot Matrix Screen Multiview CONTROLER ( K Series ) Monitoring Multiview CONTROLER ( N Series ) 3D Multiview CONTROLER ( 3D Series ) 4K Multiview CONTROLER (4k Series ) IMPORTANT NOTICE The company reserves the right to update the manual according to improvement of products without any prior notice. In the process of using, if any content in this manual is inconsistent with actual products or there is any further question during use, please contact document information department of our company. Please read this manual carefully before using the CONTROLER and properly file it after reading for future reference. Pictures are for reference only, subject to our available products. Please pay close attention to those with the Icon of in the article.
化妆品说明书英文翻译
Product characteristics: It replenishes sufficient water to creat a moisturizing and water-locking membrane on the skin to maintain the normal water content of the cuticle ,banlance the PH value of the skin and keep the skin healthier. Containing rich fibroin extract and varirties of valued herbal essences,it strengthens the whitening function as well as tone the dark complexion and soften the coticle to build sparking,white ,bright,hydrous and transparent skin. 活肌盈白滋润爽肤水 产品特点:外界的污染,日光的照射,生活和工作的压力另肌肤干燥粗糙,色素沉浊,暗沉无光泽,各种肌肤问题也随之而来,需要及时为肌肤补充大量水分,促进美白营养成分的吸收。 活肌盈白滋润爽肤水触感清爽、柔滑,为肌肤注入充足的水分,并形成保湿锁水薄膜,维持角质层正常含水量,平衡皮肤酸碱值,另肌肤更健康;富含蚕丝蛋白、甘草、海藻精华,提升肌肤美白原动力,改善暗沉肤色,软化角质,重塑肌肤的盈白亮丽,水凝通透。 product characteristics: Being refreshing,it slowers the oxidation caused by free radicals and blocks kinds of radiation to strengthen the resistivity of the skin. Containing rich fibroin extract and varieties of valued herbal essences, it strengthens the whitening funtion as well as concealing the dark and rough state of the skin and marking it white, smooth and fine naturally. 活肌盈BB霜 产品特点:偏黄,暗沉等肌肤问题给生活带来尴尬,需要咋打造清新裸妆的同时给肌肤提供一层保护伞,让你时刻保持自信妆容。 肌活盈白BB霜含有丰富蚕丝蛋白、甘草萃取精华能修复问题肌肤,呈现最时尚的薄透裸妆。添加高保湿美容圣品的霍霍巴油,让基督保有水润明亮,智慧型的抑油功能,维持整天完美的轻透亮。 ACTIVE WHITE MOISTURIZING LOTION Product Charateristics:with natural moisturizing factors,it keeps replenishing water an increase the elasticty of the skin to keep it more moisturized. Containing rich fibroin extract and varieties of valued herbal essences,it strenthens whitening funtion as well as toning the dark and unevening complexion to keep it moisturized,white,graceful and attractive. 肌活盈白润肤乳 产品特点:质地清透幼滑,迅速渗透,持续给予肌肤充分滋养,让干燥粗糙的肌肤变得明亮润滑,显着改善肤色,用后肌肤清透柔亮,犹如出水芙蓉般水润透白。 蕴含蚕丝蛋白、洛神花和透明质酸,深层保湿,并在肌肤表明形成锁
球阀使用说明书英文版(ball valve)
Product Manual - Operation and Maintenance Manual Product Name:API 6D Ball Valve January 2012
1Scope This manual covers manually/motor/pneumatic operated seat supported /trunnion supported ball valve having tow/three pieces body with nominal sizes DN 15mm-1200mm (1/2”-48”) and class ranges PN1.6MPa-10MPa(ANS1 class 150-2500). Valve ends may be threaded, flanged, butt-welded or socket 2 Applications 2.1 Ball valves are used to open/close the flow in pipeline. 2.2 The nature of applicable fluid depends on valve material: 2.2.1 Carbon steel valve applies to non-corrosive fluid, such as water, vapor or oil etc. 2.3 Temperature range depend on sent material: PTFE ≤130℃ RPTFE ≤160℃ PPL ≤300℃ NYLON ≤121℃ 3. standard: Basic design API 6D-2008 Inspe crlon tesring BS EN 12266.1-2003 End flange ASME B16.5-2009 TEMP. & PRESSURE ASME B16.34-2009 Face toface ASME B16.10-2009 Main parts and materials ASME materials, see Table 1 Figure 1:Trunnion Ball Valve 4 Structure 4.1 Ball Valve structure is shown in Fig. 1.
英文产品说明书
Spiral chute 1、product description Spiral chute is integrated spiral separator, spiral chute, shaker, centrifugal concentration machine characteristics of the equipment, mining, mineral processing is the best equipment, especially the seaside, riverside, sand beach, the stream of placer mining is more ideal. The product has the advantages of reasonable structure, simple installation, covers an area of small, simple operation, stable ore beneficiation, clear, large processing capacity, high efficiency enrichment ratio high, high recovery rate, reliable operation characteristics. Have weight light, moisture-proof, rust-proof, corrosion resistance, of the feeding quantity and concentration, particle size, quality of volatility adaptability is strong, no noise. 2、Separation principle Spiral chute is a membrane flow gravity separation equipment, the selection principle is the use of useful minerals and gangue in proportion, particle size, shape differences, in rotating inclined flow by gravity, centrifugal force, hydrodynamic pressure and friction force with different groove face, realize the useful minerals and gangue stratification, branch tape sorting. Heavy, coarse granularity, fast sedimentation of particles gradually moved towards the spiral groove inner edge, the proportion of small, fine particle size, particle sedimentation slow gradually moved to the spiral groove edge, gradually banding, culminating in the spiral groove end by cutting ore tank is respectively connected out, to realize separation. 3、Application The sorting equipment for grain size mm fine iron ore, titanium ore, chromite,
产品说明书范文英文版
产品说明书范文英文版 电子产品说明书——媒体音响英文说明书范例(中英) 便携式多媒体音响 Portable Multimedia Acoustics 使用说明书User’s Manual 专注于完美音质的追求?? Concentrate on perfect sound pursuit? 感谢您使用本公司出品的数码产品,为了让您轻松体验 产品,我们随机配备了内容详尽的使用说明,您从中可以获 取有关产品的介绍,使用方法等方面的知识。在您开始使用 本机之前请先仔细阅读说明书,以便您能正确的使用本机, 如有任何印刷错误或翻译失误望广大用户谅解,当涉及内容 有所更改时,恕不另行通知。 Thank you for using this digital product of our company. In order to let you experience the product swimmingly, detailed instruction is provided which you can find the product’s introduction, usage and other information. Before using this product, please read the manual carefully, so that you can correctly use it. In case of any printing or translation error, we apologize for the inconvenience. As for the content change, we are sorry for no further notice. 一、产品概述 General Information 本机是一款外观小巧,设计精美、携带方便多媒体小音响, 适用于家居、户外旅游、办公室等场所,随时随地享受音乐
如何翻译英文说明书
如何翻译英文说明书 【篇一:英语药品说明书的翻译】 英语药品说明书的翻译 英语药品说明书由以下12项内容组成,大多数英语药品说明书结 构基本相同。 1. pakage insert (insert)说明书 2. drug name (medicine) 药品 名称 3. description 性状 4. action 作用 5. indication适应症 6. contraindications 禁忌症 7. precaution注意事项 8. side effects副作用 9. dosage and administration 剂量和用法 10. dacking 包装 11.expiry 失效期 12. manufactring date (manu.date)出厂日期 13.reference 参考文献 药品名称 一、英语药品说明书一般用商品名,由生产厂家向该国政府有关部 门申请注册正式名称,受该国政府法律保护,在药品名称的右上角 有个○r的符号,意思是已经申请注册的法定名称,不可随意改变名称。○r=recive 在药品之后有时issued to(for) the medical profession only短语,意:仅供医界参考。 r例:mobic ○ issued to(for) the medical prfession. 二、译法:分四种译法 1. 音译:按英语读音用相应的汉字译出 例: mobic莫比可 rifampicin利福平 2. 意译:按药品名称各组成部份的英语意义译成汉语 例: streptomycine是由strepto和mycine组成,其中 strepto(链球状),mycine(霉素),则按英语意思,译成:链霉素。 因此必须掌握大量前、后缀,才以准确翻译,此种译法多数是抗生 素类药物。 nitroglycerine 由nitro(硝基)+glycerin(甘油)组成,则意为硝酸甘 油 aminophylline由amino+phylline译:氨茶碱 3. 音意并译:按英语药名组成,前面部份按音译,后面部份按意译。例:kanamycine由kama(卡那)+mycine(霉素)组成,按前音后的 方法,译为卡那霉素。
英文说明书
AutoCut WEDM Program-Control System Instruction Designed by:Dongrui Lee 2009.1
CONTENT CONTENT (2) Chapter1The Introduction of AutoCut WEDM Program-Control System (1) 1.1Introduction (1) 1.2The Structure of AutoCut System (1) 1.3Main functions of AutoCut system (2) 1.4Main Characteristics of AutoCut System (3) 1.5Running condition of AutoCut System (3) Chapter2AutoCut system hardware and software installation (4) 2.1Hardware Installation (4) 2.2Software installation (7) 2.3Uninstall Software (7) Chapter3The usage of NCCAD (9) Chapter4The usage of AutoCut For AutoCAD (10) 4.1Draw Wedm Curve (11) 4.2Track Designing (13) 4.3Track process (21) 4.4Track Amendment (23) 4.5Technics Library (23) 4.6About AutoCut (25) Chapter5The usage of AutoCut control software (26) 5.1Interface (26) 5.2Load process task (27) 5.3Settings (30) 5.4Start Processing (35) 5.5Motor (37) 5.6High-Frequency (37) 5.7Wire (38) 5.8Pump (38) 5.9Gapping (38) 5.10Incising Limit Speed (39) 5.11Empty Walking Limit Speed (39) 5.12Manual Function (39) 5.13Pitch Correct (43) 5.14Servo Debug (45) 5.15High-Frequency Settings (46) 5.16About (47) Chapter6Contact (48)
奶粉说明书 英文版
Product Description A hypoallergenic formula proven to manage colic fast, often within 48 hours. If your baby has an allergy to the cow's milk protein in infant formula, Nutramigen with enflora LGG contains both extensively hydrolyzed protein to manage colic fast and enflora LGG to promote immune system balance. These two ingredients offer a more comprehensive approach working together to help babies feel better faster. The benefits of these two ingredients include. Hypoallergenic, easy-to-digest protein, proven to promote skin health in infants through 18 months of age. Proven to promote digestive system health within 1 week of use. Effectively manages colic in 48 hours, enflora LGG probiotic to promote immune system balance. Nutramigen with enflora LGG is also. Nutritionally balanced, lactose free, and has no added sucrose. Product Details Product Dimensions: 4.2 x 4.2 x 4.8 inches Shipping Weight: 6.8 pounds Shipping: Currently, item can be shipped only within the U.S. Origin: USA ASIN: B0074IQ0ZA UPC: 300871239418 300875103982
产品说明书英文版(DOCX 39页)
产品说明书英文版(DOCX 39页) 部门: xxx 时间: xxx 整理范文,仅供参考,可下载自行编辑
X-Link PRODUCT MANUALS FOR MULTIVIEW CONTROLER
This manual applies to the following models: 3UA Multiview CONTROLER ( Optional Front Panal,LCD Console ) 3UB Multiview CONTROLER ( Optional Front Panal,LCD Console ) 8U Multiview CONTROLER ( Optional Front Panal ) 8U-S Multiview CONTROLER( Optional Front Panal ) 12U Multiview CONTROLER LED Very-large Dot Matrix Screen Multiview CONTROLER ( K Series ) Monitoring Multiview CONTROLER ( N Series ) 3D Multiview CONTROLER ( 3D Series ) 4K Multiview CONTROLER (4k Series ) IMPORTANT NOTICE The company reserves the right to update the manual according to improvement of products without any prior notice. In the process of using, if any content in this manual is inconsistent with actual products or there
说明书的英文怎么写
目前,我国的产品说明书的翻译有许多不尽如人意的地方,概括起来,是由于不懂英语说明书的句型和选词不当所致。以下,我们就来讨论一下说明书的句型和选词问题。 一、产品说明书的若干句型 句型是语言结构的要素。无论英译汉还是汉译英都离不开句型。学习、掌握和使用句型是翻译工作者的必由之路。现将英文产品说明书的若干常见句型说明如下: 1.(情态动词)be+形容词(或过去分词)+目的状语 这种句型用语文章开头,说明该产品是做什么用的,例如: 1)本冲床主要用于冲孔、落料、弯曲、浅拉伸、剪切等冷冲工艺。 this press is mainly suitable for cold working operations, such as punching, blanking, bending, shallow drawing, cutting and so on. 2)该产品用于温度225℃以下的热水管或蒸汽管道上。 1 this product can be used in hot water or steam line with the temperature limited to 225℃. 类似常见的类型还有: ... is used for... ... is used to ... ... is used as... ... is designed to... ... is suitable to be used in... ...is available for (to)... ...may be applicable to... ...may be used to... ...can be used as... ...can be designed as... ...is adapted for (to)... 2 ...is designed to be...so as to... ...is capable of... 2.(情态动词)+be+介词短语 情态动词should,can,may+be+介词短语,这种句型用于说明物体的特征、状态和范围,以及计量单位等。如: 1) cyj15-18-18型抽油机的结构紧凑。 2)风机用联轴器连接时,请注意电动机与主轴同心度,以免产生振动或引起轴承发热等情况。 when the blower is driven in mode “d”, the motor shaft and main shaft should be in correct alignment so as to avoid vibration and bearing heating.(原说明书把联轴器传动,叫“d”式传动) 3.be+形容词+介词短语 3 1)该机器操作时安全可靠,便于维修,能在恶劣条件下工作。 it is reliable in usage, convenient in maintenance and able to work under very bad conditions. 2)电机皮带轮上备有锥套,便于安装和拆卸。
产品说明书中文英文
深圳市慧拓鑫科技有限公司 Shenzhen Hui Tuo Xin Technology Co., Ltd. 产品资料 Product information 1、TOP电源防雷箱系列(TOP Power lightning protection box series) 产品介绍Product introduction TOP电源防雷箱系列依据IEC标准设计,8/20波形最大通流容量20KA-100KA,能对电源系统的浪涌电压进行有效的钳制,电源B、C、D级产品均具备。 TOP Power lightning protection box series is designed according to IEC
standard, 8/20 wave maximum flow capacity of 20KA-100KA, to power system voltage surge effectively clamped, power supply B, C, D products have. TOP电源防雷箱配系列具备测试指示灯功能,能有效的指示防雷箱工作电源、浪涌防护状态,并可选备雷击计数、远程遥信监测功能。 TOP Power lightning protection box series Have a test indicator function,Can effectively indicate the lightning protection box power supply、Surge protection status And optional lightning counting、Remote remote monitoring function ★电涌保护器失效报警功能/相零反接及接地不良报警 ★(Surge protection device failure alarm function / Phase zero reverse connection and grounding alarm) ★雷击计数显示、电源指示功能(可选) ★ Lightning counting display,Power indicator function(Optional) ★电浪保护器远程监测功能(失效) ★ Remote monitoring function(Failure) ★残压低、响应时间快 ★ Residual depression and Fast response time ★安装设计人性化、结构严谨 ★ Installation design of humanity and Strict structure ★工作环境温度适应性强 ★ Working environment temperature adaptability
英语药品说明书的翻译
英语药品说明书的翻译 英语药品说明书由以下12项容组成,大多数英语药品说明书结构基本相同。 1. Pakage Insert (Insert) 说明书 2. Drug Name (Medicine) 药品名称 3. Description 性状 4. Action 作用 5. Indication 适应症 6. Contraindications 禁忌症 7. Precaution 注意事项8. Side Effects 副作用 9. Dosage and Administration 剂量和用法10. Dacking 包装 11.Expiry 失效期12. Manufactring Date (Manu.date)出厂日期13.Reference 参考文献 药品名称 一、英语药品说明书一般用商品名,由生产厂家向该国政府有关部门申请注册正式名称,受该国政府法律保护,在药品名称的右上角有个○R的符号,意思是已经申请注册的法定名称,不可随意改变名称。○R=Recive 在药品之后有时Issued to(for) the Medical profession only短语,意:仅供医界参考。 例:Mobic ○R Issued to(for) the medical prfession. 二、译法:分四种译法 1. 音译:按英语读音用相应的汉字译出 例:Mobic 莫比可Rifampicin 利福平 2. 意译:按药品名称各组成部份的英语意义译成汉语 例:Streptomycine 是由Strepto和mycine组成,其中Strepto(链球状),mycine(霉素),则按英语意思,译成:链霉素。因此必须掌握大量前、后缀,才以准确翻译,此种译法多数是抗生素类药物。 Nitroglycerine 由Nitro(硝基)+glycerin(甘油)组成,则意为硝酸甘油Aminophylline由Amino+phylline 译:氨茶碱 3. 音意并译:按英语药名组成,前面部份按音译,后面部份按意译。 例:Kanamycine由Kama(卡那)+mycine(霉素)组成,按前音后的方法,译为卡那霉素。 Gentamycine由Genta+mycine 译为庆大霉素。
英文版岗位说明书
JOB DESCRIPTION SUMMARY(Write a brief summary of job.) The person in this position is responsible for assisting the general manager to deal with daily affairs, providing administrative support to the other administrative and operational aspects of the work.Secretary of general manager Must have strong coordination and execution to process a variety of documents. she should timely find problems to the general manager for feedback, and put forward her own suggestions. Transmit an order from above, to convey the managing director’s instructions, and supervise each department executive. SCOPE AND IMPACT OF JOB Basic responsibilities 1.Summing up the company's annual work ,including a rrange and master the general manager’s schedule. 2.Responsible for assisting the General Manager arrange meetings, prepare materials and record the conference summary 3.Responsible for assisting the general manager of the daily reception work . 4.Assist the General Manager handling correspondence files,and drafting, printing, registration and archiving the managing documents 5.Instructe the drafting of relevant documents according to general manager of the instructions 6.Participate in regular meetings of the company, and make a report 7.Answer the phone, make appropriate response, if necessary,take good the telephone records 8.To complete other duties that the general manager or the director of the Office assigned. Special Responsibilities 1.Assist the General Manager Coordinate the relationship between the various departments and deal with the relationship between customers and government officials 2.Could treat with various emergencies properly, timely and effectively https://www.360docs.net/doc/1c4353698.html,plete daily work independently within the scope of work when the General Manager gose out for business, REQUIRED KNOWLEDGE AND EXPERIENCE(knowledge and experience necessary to do job) SKILLS Must have the ability to use the email and OA system on Lotus Notes skillfully. Must have basic composition skills. Must be familiar with all kinds of Office Softwares. Typing speed should be no less than 70 words per minute. Must have the knowledge of document management and also needs to know something about commerce. Must be good at English. Related work experience