操作系统-Linux课程实验报告材料
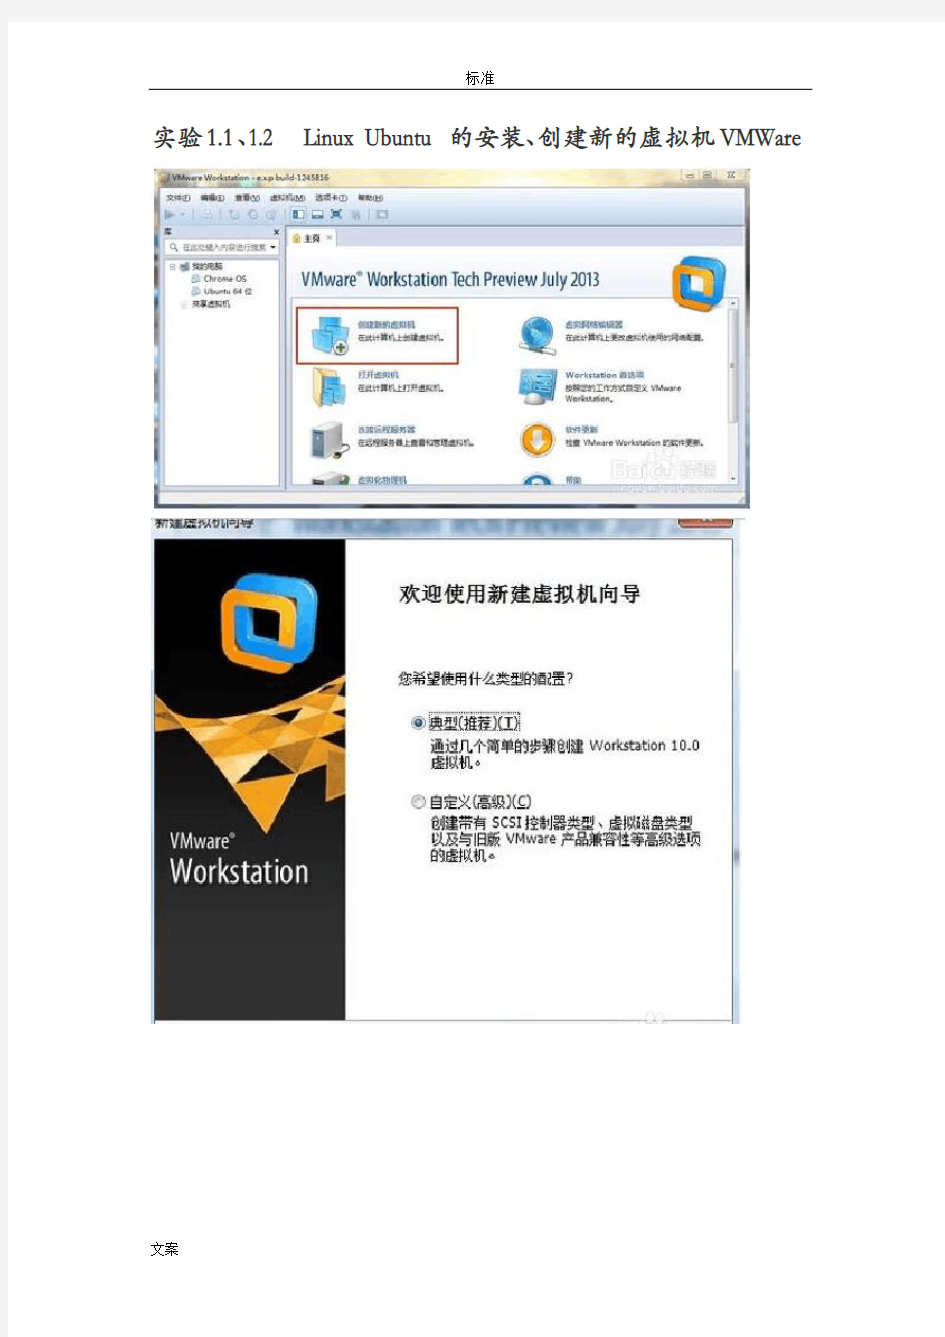
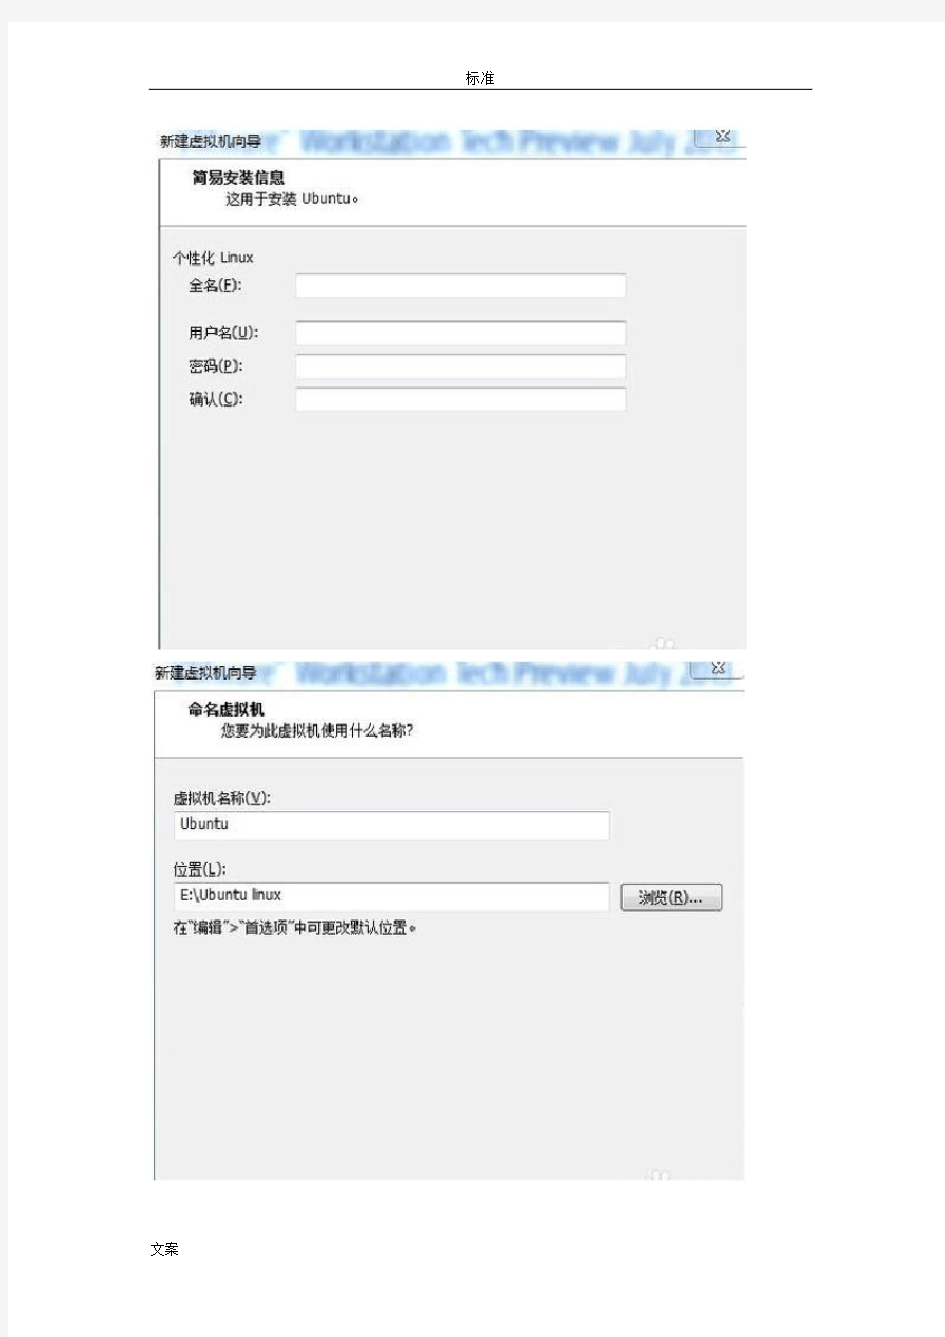
实验1.1、1.2 Linux Ubuntu的安装、创建新的虚拟机VMWare
实验1.3 Shell编程
1.实验目的与内容
通过本实验,了解Linux系统的shell机制,掌握简单的shell编程技巧。
编制简单的Shell程序,该程序在用户登录时自动执行,显示某些提示信息,如“Welcome to Linux”, 并在命令提示符中包含当前时间、当前目录和当前用户名等基本信息。
2.程序源代码清单
#include
#include
int main(){
printf("Hello Linux\n");
int pid;
int state;
int pfd[2];
pipe(pfd);
if (fork()==0){
printf("In the grep progress\n");
dup2(pfd[0],0);
close(pfd[0]);
close(pfd[1]);
execlp("grep","grep","sh",0);
perror("exelp grep error");
}
esle if(fork()==0){
printf("In the ps progress\n");
dup2(pfd[1],1);
close(pfd[0]);
close(pfd[1]);
execlp("ps","ps","-ef",0);
perror("execlp ps -ef");
}
close(pfd[1]);
close(pfd[0]);
wait(&state);
wait(&state);
}
实验2.3 内核模块
实验步骤:
(1).编写内核模块
文件中主要包含init_clock(),exit_clock(),read_clock()三个函数。其中init_clock(),exit_clock()负责将模块从系统中加载或卸载,以及增加或删除模块在/proc中的入口。read_clock()负责产生/proc/clock被读时的动作。(2).编译内核模块Makefile文件
# Makefile under 2.6.25
ifneq ($(KERNELRELEASE),)
#kbuild syntax. dependency relationshsip of files and target modules are listed here.
obj-m := proc_clock.o
else
PWD := $(shell pwd)
KVER ?= $(shell uname -r)
KDIR := /lib/modules/$(KVER)/build
all:
$(MAKE) -C $(KDIR) M=$(PWD) modules
clean:
rm -rf .*.cmd *.o *.mod.c *.ko .tmp_versions *.symvers *.order
endif
编译完成之后生成proc_clock.ko模块文件。
(3).内核模块源代码clock.c
#include
#include
#include
#include
#include
#include
#define MODULE
#define MODULE_VERSION "1.0"
#define MODULE_NAME "clock"
struct proc_dir_entry* my_clock;
int read_clock(char* page, char** start, off_t off, int count, int* eof, void* data) {
int len;
struct timeval xtime;
do_gettimeofday(&xtime);
len = sprintf(page, "%d %d\n", https://www.360docs.net/doc/10806545.html,_sec, https://www.360docs.net/doc/10806545.html,_usec);
printk("clock: read_func()\n");
return len;
}
struct proc_dir_entry *clock_proc_file;
int init_clock(void)
{
clock_proc_file
=create_proc_read_entry("clock",0,NULL,read_clock,NULL); return 0;
}
void exit_clock(void)
{
remove_proc_entry("clock",clock_proc_file);
}
module_init(init_clock)
module_exit(exit_clock)
MODULE_LICENSE("GPL");
(4).编译内核模块
# make
(5).加载内核模块
在系统root用户下运行用户态模块命令装载内核模块# insmod proc_clock.ko
(6).测试
在终端中输入以下命令:
#cat /proc/clock
(7).卸载内核模块
在系统root用户下运行用户态模块命令卸载内核模块
#rmmod proc_clock.ko
实验2.4 系统调用
实验步骤:
(1). 添加新调用的源代码
在./linux-2.6.33.7/arch/x86/kernel/sys_i386_32.c中添加相应的调用代码asmlinkage int sys_xwlcall(struct timeval *tv)
{
struct timeval ktv;
do_gettimeofday(&ktv);
copy_to_user(tv,&ktv,sizeof(ktv));
printk(KERN_ALERT"PID %ld called sys_xwlcall()./n",(long)current->pid);
return 0;
}
(2). 连接系统调用
a、修改./linux-2.6.33.7/arch/x86/include/asm/unistd_32.h,
在系统调用列表后面相应位置添加一行,这样在用户空间做系统调用时就不需要知道系统调用号了,如果在用户空间指明了调用号,就可以省略这一步,实际上我就没写:
#define __NR_xwlcall338
新增加的调用号位338
b、修改./linux-2.6.33.7/arch/x86/kernel/syscall_table_32.S
在ENTRY(sys_call_table)清单最后添加一行,这步至关重要,338就是这里来的:
.long sys_xwlcall
(3). 重建新的Linux内核
先安装好编译内核必要的软件包:
# sudo apt-get install build-essential kernel-package libncurses5-dev 复制当前内核的配置文件
# cp /boot/config-`uname -r` ./.config
保存配置文件
# sudo make menuconfig
使用debian的的内核编译方法,要简单很多
# sudo make-kpkg-initrd--initrd--append-to-version=xwlcall kernel_image kernel-headers
运行以下deb包,安装内核镜像和模块:
linux-image-2.6.33.7xwlcall_2.6.33.7xwlcall-10.00.Custom_i386.deb
运行以下deb包,安装内核头文件:
linux-headers-2.6.33.7xwlcall_2.6.33.7xwlcall-10.00.Custom_i386.deb
运行以下命令,使内核启动时能调用模块,比如硬件驱动:
# sudo update-initramfs -c -k 2.6.33.7xwlcall
此次编译的内核采用ubuntu默认配置文件,通用性非常好,可以拷贝到大部分
x86机器上安装。安装后系统自动会修改grub启动选单。
4. 重建引导信息
a、安装deb包就自动重建引导信息了,无须另行处理。
b、如果仍然不放心,可以运行
# update-grub
5.重新引导从新的内核进入
6. 修改系统调用表
7. 测试
实验3.3 Shell编程实验(进程管理实验)
1、实验目的
通过编写shell程序,了解子进程的创建和父进程与子进程间的协同,获得多进程程序的编程经验。
2、实验内容1
设计一个简单的shell解释程序,能实现基本的bsh功能。
3、实验原理
将每一条命令分子段压入argv栈。然后再子进程中调用execvp()来实现该命令的功能。
4、代码(源代码清单)
#include
#include
#include
#define BUFFERSIZE 256
//最简单的shell,只是简单的执行命令调用,没有任何的其他功能int main()
{
char buf[BUFFERSIZE],*cmd,*argv[100];
char inchar;
int n,sv,buflength;
int result;
buflength = 0;
for(;;) {
printf("=> ");
//处理过长的命令;
inchar = getchar();//读取命令
while (inchar != '\n' && buflength < BUFFERSIZE ){
buf[buflength++] = inchar;
inchar = getchar();
}
if (buflength > BUFFERSIZE){
printf("Command too long,please enter again!\n");
buflength = 0;
continue;
}
else
buf[buflength] = '\0';
//解析命令行,分成一个个的标记
//char *strtok(char *s,char *delim)
//分解字符串为一组字符串。s为要分解的字符串,delim为分隔符字符串。
cmd=strtok(buf," \t\n");
if(cmd) {
if(strcmp(cmd,"exit")==0) exit(0);
n=0;
argv[n++]=cmd;
while(argv[n++]=strtok(NULL," \t\n"));
if(fork()==0) {
execvp(cmd,argv);
fprintf(stderr,"sxh:%s:command not found.\n",buf);//如果子进程顺利执行,这段话是不会执行的
exit(1);
}
wait(&sv);
buflength = 0;
}
}
}
实验内容2
编写一个带有重定向和管道功能的Shell
1.设计思路
通过fork()创建子进程,用execvp()更改子进程代码,用wait()等待子进程结束。这三个系统调用可以很好地创建多进程。另一方面,编写的Shell要实现管道功能,需要用pipe()创建管道使子进程进行通信。
2.源代码清单
#include
#include
#include
#include
#define BUFFERSIZE256
//具有输入输出重定向的功能和管道功能
int
main()
{
char buf[256],*buf2,*cmd,*cmd2,*argv[64],*argv2[64],*infile,*outfile;
char inchar;
int n,sv,buflength,fd[2];
for(;;) {
buflength = 0;
printf("=> ");
inchar = getchar();
while (inchar != '\n' && buflength < BUFFERSIZE ){
buf[buflength++] = inchar;
inchar = getchar();
}
if (buflength > BUFFERSIZE){
fprintf(stderr,"Command too long,please enter again!\n");
buflength = 0;
continue;
}
else
buf[buflength] = '\0';
//检查是否具有管道操作符
//strstr()在字符串中查找指定字符串的第一次出现,buf2指向管道符号前端的命令
buf2=strstr(buf,"|");
if(buf2)
*buf2++='\0';
else {
//否则查看是否具有重定向的操作符
infile=strstr(buf,"<");
outfile=strstr(buf,">");
if(infile) {
*infile='\0';
infile=strtok(infile+1," \t\n");
}
if(outfile) {
*outfile='\0';
outfile=strtok(outfile+1," \t\n");
}
}
//解析命令行,分成一个个的标记
cmd=strtok(buf," \t\n");
//执行管道命令
if(buf2){
if(strcmp(cmd,"exit")==0) exit(0);
if(!cmd) {
fprintf(stderr,"Command token error.\n");
exit(1);
}
n=0;
//管道后端的命令
argv[n++]=cmd;
while(argv[n++]=strtok(NULL," \t\n"));
//管道前端的命令
cmd2=strtok(buf2," \t\n");
if(!cmd2) {
fprintf(stderr,"Command token error.\n");
exit(1);
}
n=0;
argv2[n++]=cmd2;
while(argv2[n++]=strtok(NULL," \t\n"));
pipe(fd);
if(fork()==0) {
dup2(fd[0],0); //dup2 复制文件句柄,将fd[0]复制到描述符0。
close(fd[0]); close(fd[1]);
execvp(cmd2,argv2);
fprintf(stderr,"** bad command\n"); exit(1);
} else if(fork()==0) {
dup2(fd[1],1);