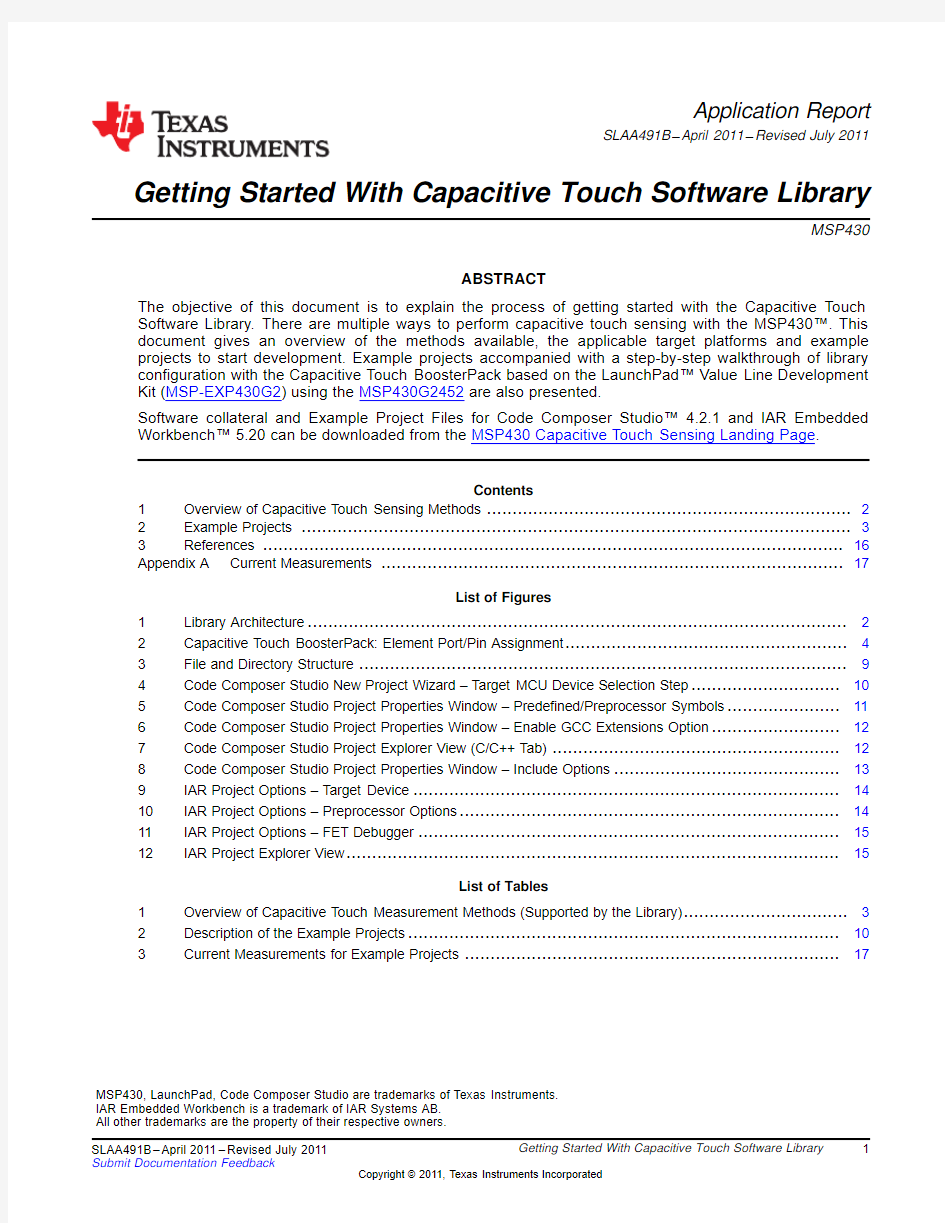
TI官方文档:电容式触摸屏使用说明(风火轮)

Application Report
SLAA491B–April2011–Revised July2011
Getting Started With Capacitive Touch Software Library
MSP430
ABSTRACT
The objective of this document is to explain the process of getting started with the Capacitive Touch Software Library.There are multiple ways to perform capacitive touch sensing with the MSP430?.This document gives an overview of the methods available,the applicable target platforms and example projects to start development.Example projects accompanied with a step-by-step walkthrough of library configuration with the Capacitive Touch BoosterPack based on the LaunchPad?Value Line Development Kit(MSP-EXP430G2)using the MSP430G2452are also presented.
Software collateral and Example Project Files for Code Composer Studio?4.2.1and IAR Embedded Workbench?5.20can be downloaded from the MSP430Capacitive Touch Sensing Landing Page.
Contents
1Overview of Capacitive Touch Sensing Methods (2)
2Example Projects (3)
3References (16)
Appendix A Current Measurements (17)
List of Figures
1Library Architecture (2)
2Capacitive Touch BoosterPack:Element Port/Pin Assignment (4)
3File and Directory Structure (9)
4Code Composer Studio New Project Wizard–Target MCU Device Selection Step (10)
5Code Composer Studio Project Properties Window–Predefined/Preprocessor Symbols (11)
6Code Composer Studio Project Properties Window–Enable GCC Extensions Option (12)
7Code Composer Studio Project Explorer View(C/C++Tab) (12)
8Code Composer Studio Project Properties Window–Include Options (13)
9IAR Project Options–Target Device (14)
10IAR Project Options–Preprocessor Options (14)
11IAR Project Options–FET Debugger (15)
12IAR Project Explorer View (15)
List of Tables
1Overview of Capacitive Touch Measurement Methods(Supported by the Library) (3)
2Description of the Example Projects (10)
3Current Measurements for Example Projects (17)
MSP430,LaunchPad,Code Composer Studio are trademarks of Texas Instruments.
IAR Embedded Workbench is a trademark of IAR Systems AB.
All other trademarks are the property of their respective owners.
1 SLAA491B–April2011–Revised July2011Getting Started With Capacitive Touch Software Library Submit Documentation Feedback
Copyright?2011,Texas Instruments Incorporated
…
…
…
Overview of Capacitive Touch Sensing Methods https://www.360docs.net/doc/526107046.html, 1Overview of Capacitive Touch Sensing Methods
There are several methods of performing capacitive touch sensing using the MSP430family of devices.A combination of different peripheral sets across different device families can be used to measure the
capacitive touch response from a sensor.
Figure1breaks down the architecture of the Capacitive Touch Software Library.The top layer is the
Application Layer that has user-defined application code.The layers underneath belong to the Capacitive Touch Library.The bottom layer is the Hardware Peripheral Layer that contains low-level functions for
peripheral configurations.The Hardware Abstraction Layer(HAL)has functions for implementing sensing techniques using different peripheral sets.The next layer up is the Capacitive Touch Layer that contains high-level abstract functions for implementing sensor structures such as buttons,wheels and sliders.Note that the level of abstraction increases from left to right,where the Raw simply outputs raw counts versus the Wheel that outputs touch position.
Figure1.Library Architecture
2Getting Started With Capacitive Touch Software Library SLAA491B–April2011–Revised July2011
Submit Documentation Feedback
Copyright?2011,Texas Instruments Incorporated
https://www.360docs.net/doc/526107046.html, Example Projects Table1lists the different methods available.The Method Name column on the left hand side indicates the HAL Description Name as implemented in the Capacitive Touch Library.Details on each method and
implementation can be found in the Capacitive Touch Library Programmer's Guide(SLAA490)[1].
Table1.Overview of Capacitive Touch Measurement Methods(Supported by the Library) Method Name Measurement Example MSP430 (HAL description)Sensing Type Peripheral Timer Gate Timer Benefits Devices
RO_COMPAp_TA0_WDTp Relaxation Comparator TimerA0Watchdog Enables low-power MSP430F20x1
Oscillator(RO)COMPA+Timer WDT+mode during MSP430F4xx
measurements RO_PINOSC_TA0_WDTp Relaxation Pin Oscillator TimerA0Watchdog Enables low-power MSP430G2xx2
Oscillator(RO)Timer WDT+Modes during
measurements RO_PINOSC_TA0Relaxation Pin Oscillator TimerA0Software Does not use MSP430G2xx2
Oscillator(RO)counter watchdog timer
resource
RO_COMPB_TA0_WDTA Relaxation Comparator TimerA0Watchdog Enables low-power CC430Fxx
Oscillator(RO)COMPB Timer WDTA Modes during
measurements RO_COMPB_TA1_WDTA Relaxation Comparator TimerA1Watchdog Enables low-power MSP430F55xx
Oscillator(RO)COMPB Timer WDTA Modes during
measurements RC_PAIR_TA0RC Time Digital I/O TimerA0N/A Simple All MSP430devices
Constant(RC)and resistor Implementation fRO_PINOSC_TA0_SW Fast Relaxation Pin Oscillator Software TimerA0Fast Scan Rate MSP430G2xx2
Oscillator(fRO)counter
Descriptions of the RO and RC principles can be found in PCB-Based Capacitive Touch Sensing With
MSP430(SLAA363)[2]and a detailed design guide for the RC-based single touch sensor can be found in the MSP430Capacitive Single-Touch Sensor Design Guide(SLAA379)[3].
2Example Projects
2.1Overview of the Example Projects
The example project uses the Capacitive Touch BoosterPack on the LaunchPad value line development kit with the MSP430G2452MCU.The LaunchPad is a low-cost development kit with a20-pin PDIP
socket,on-board programmer and debugger,universal serial bus(USB)communication to PC,etc.[4].
Along with the8KB of Flash and256B of RAM,the MSP430G2452MCU has16touch-sense enabled input/output(I/O)pins that use the pin oscillator feature aforementioned in Section1[5].
3 SLAA491B–April2011–Revised July2011Getting Started With Capacitive Touch Software Library Submit Documentation Feedback
Copyright?2011,Texas Instruments Incorporated
Wheel P2.4 (up)P2.1 (left)P2.3 (right)P2.2 (down)
P2.0 (proximity)
P2.5 (middle)
Example Projects https://www.360docs.net/doc/526107046.html,
2.2Overview of the Capacitive Touch BoosterPack Hardware
The capacitive touch BoosterPack is based on the pin oscillator feature and illustrates three types of sensors:Proximity,Button and Wheel (group of buttons).Figure 2shows the layout of the sensors and port/pin definition to the MSP430G2452MCU.
Figure 2.Capacitive Touch BoosterPack:Element Port/Pin Assignment
There are also nine LED elements that are multiplexed to indicate touch:four on either side and one for the middle element.For details on the schematic connections and PCB layout,see the Capacitive Touch BoosterPack User ’s Guide (SLAU337)[6].
2.3Configuring the Software Library
The Capacitive Touch Software Library must be configured with the port definition,sensing method,number of elements,and other factors.These factors can be configured in structure.c source code and structure.h header files.The following steps are presented using the
RO_PINOSC_TA0_WDTp_One_Button Example where the sensing method is RO_PINOSC_TA0_WDTp and the sensor structure comprises of one button (the middle element).
1.Element Definition:Declare the element structure and assign the port/pin definition.Example:The middle element is mapped to P
2.5(Port2/Pin5).Within the structure .c source code file:
//Middle Element (P2.5)
const struct Element middle_element ={
.inputPxselRegister =(uint8_tt *)&P2SEL,.inputPxsel2Register =(uint8_t *)&P2SEL2,.inputBits =BIT5,
//When using an abstracted function to measure the element //the 100*(maxResponse -threshold)<0xFFFF //ie maxResponse -threshold <655.maxResponse =200+655,.threshold =200//Set threshold to zero for element characterization
};
Within the structure.h header file:
extern const struct Element middle_element;
4Getting Started With Capacitive Touch Software Library
SLAA491B –April 2011–Revised July 2011
Submit Documentation Feedback
Copyright ?2011,Texas Instruments Incorporated
https://www.360docs.net/doc/526107046.html, Example Projects NOTE:The threshold variable should be set to zero for the element characterization step.
NOTE:The maxResponse variable is required to be set only for the wheel/slider implementation
and is not needed for a single sensor implementation.For more details,see the Capacitive
Touch Library Programmer's Guide(SLAA490)[1]
2.Sensor Structure Definition:Declare the sensor structure and define the sensing method,number of
sensor elements,the gate timer source,and the measurement window.
Example:The sensor structure:
?Comprised of one element(the middle element)
?Sensing method is the relaxation oscillator using the pin oscillator feature
?TimerA0is measurement timer;watchdog timer(WDT)is gate timer
Within the structure.c source code file:
//One Button Sensor
const struct Sensor one_button=
{
.halDefinition=RO_PINOSC_TA0_WDTp,//Sensing Method
.numElements=1,//#of Elements
.baseOffset=0,//First element index=0
//Pointer to elements
.arrayPtr[0]=&middle_element,//point to middle element
//Timer Information
.measGateSource=GATE_WDT_ACLK,//0->SMCLK,1->ACLK
.accumulationCycles=WDTp_GATE_64//64-Default
};
Within the structure.h header file:
extern const struct Sensor one_button;
3.Characterizing Element Performance:
?Initialize Threshold:As mentioned in Step1,the threshold value should be initialized to zero for element characterization.
?Configure the Gate Timer:This example uses the RO_PINOSC_TA0_WDTp method with the Watchdog timer used as the Gate Timer.The Gate Time will have a direct impact on the noise
immunity,touch sensitivity,power consumption and overall performance of the sensor.
–Adjust the Gate Timer Source(measGateSource)to source the WDT from either
low-frequency ACLK or high-frequency SMCLK.
–Adjust the measurement window(accumulationCycles)to select between different WDT intervals.
5 SLAA491B–April2011–Revised July2011Getting Started With Capacitive Touch Software Library Submit Documentation Feedback
Copyright?2011,Texas Instruments Incorporated
Example Projects https://www.360docs.net/doc/526107046.html, Within the structure.c source code file:
//One Button Sensor
const struct Sensor one_button=
{
.halDefinition=RO_PINOSC_TA0_WDTp,//Sensing Method
.numElements=1,//#of Elements
.baseOffset=0,//First element index=0
//Pointer to elements
.arrayPtr[0]=&middle_element,//point to middle element
//Timer Information
//Select Gate Timer Source for Watchdog Timer
//.measGateSource=GATE_WDT_SMCLK,//SMCLK?
.measGateSource=GATE_WDT_ACLK,//ACLK?
//Select Measurement Window timeframe by selecting
//the Watchdog Timer Input Clock divider setting
//.accumulationCycles=WDTp_GATE_32768//32768
//.accumulationCycles=WDTp_GATE_8192//8192
//.accumulationCycles=WDTp_GATE_512//512
.accumulationCycles=WDTp_GATE_64//64
};
?Setup the characterization function:Once the Gate Time has been configured,the main() function should call the Baseline tracking function and monitor the counts returned from the
TI_CAPT_Custom()function.This action can be accomplished by un-commenting or declaring the
following compiler directive in the main.c source code file.
//Uncomment to have this compiler directive run characterization functions only
#define ELEMENT_CHARACTERIZATION_MODE
When the compiler directive ELEMENT_CHARACTERIZATION_MODE is defined,the following code
for element characterization is compiled within main.c source code file.
//Within the application layer source code file:main.c
#include"CTS_Layer.h"
//Delta Counts returned from the API function for the sensor during characterization
unsigned int dCnt;
void main(void)
{
WDTCTL=WDTPW+WDTHOLD;//Stop watchdog timer
................................//Set up system clocks
BCSCTL3|=LFXT1S_2;//LFXT1=VLO Clock Source
P1OUT=0x00;//Drive all Port1pins low
................................//Initialize Ports
P2DIR=0xFF;//Configure all Port2pins outputs
//Initialize Baseline measurement
TI_CAPT_Init_Baseline(&one_button,5);
while(1)
{
//Get the raw delta counts for element characterization
TI_CAPT_Custom(&one_button,&dCnt);
__no_operation();//Set breakpoint here
}
}
6Getting Started With Capacitive Touch Software Library SLAA491B–April2011–Revised July2011
Submit Documentation Feedback
Copyright?2011,Texas Instruments Incorporated
https://www.360docs.net/doc/526107046.html, Example Projects ?Getting the Characterization Delta Counts:To get the delta counts for element characterization, set a breakpoint on the NOP following the TI_CAPT_Custom()function and add the variable dCnt
to the Watch window.Run the program several times and record the value for the following two
cases:
–No Touch:No finger is touching the middle element and no conductive object in the immediate vicinity of the sensor.This is effectively characterizing the background noise.Record the
maximum value of dCnt in this scenario as noTouchCnt.
–Touch:A finger is touching the middle element or some conductive object is in the immediate vicinity of the sensor.This is effectively characterizing the touch response sensitivity.Record
the minimum value of dCnt in this scenario as TouchCnt.
4.Setting the Threshold Value:The threshold value should nominally be set to the middle of the range:
threshold=(TouchCnt-noTouchCnt)/2.The threshold can be set higher or lower to increase noise
immunity or increase sensitivity.
NOTE:Setting a threshold value too low increases the probability of false triggers(and make it
susceptible to noise).Setting a threshold value too high causes the sensor to not recognize
the presence of a conductive object.
Once the threshold value is calculated,the respective element structure should be updated with the
new value.For example,during the characterization process,noTouchCnt=100and TouchCnt=
1000.The threshold value should be set to450.
Within structure.c source code file:
//Middle Element(P2.5)
const struct Element middle_element={
.inputPxselRegister=(uint8_t*)&P2SEL,
.inputPxsel2Register=(uint8_t*)&P2SEL2,
.inputBits=BIT5,
//When using an abstracted function to measure the element
//the100*(maxResponse-threshold)<655
.maxResponse=450+655,
.threshold=450//Update the threshold after characterization NOTE:Steps3and4may have to be attempted multiple times to determine the appropriate gate
time for the PCB layout,neighboring element structures and application noise levels.This is
an iterative fine-tuning process.
https://www.360docs.net/doc/526107046.html,ing API calls to achieve higher levels of abstraction:The library provides several API calls that
can abstract out all of the inner workings,such as baseline tracking,rate of change,etc.These calls
provide the advantage of having streamlined code in the Application Layer.
NOTE:All of the measurement API functions(with the exception of the TI_CAPT_RAW()function)
update the baseline tracking.The TI_CAPT_Update_Baseline()and/or
TI_CAPT_Init_Baseline()functions should be used if the sensor is not measured for a long
period of time(during which drift over time in supply voltage,temperature,or environment
conditions may have occurred).
7 SLAA491B–April2011–Revised July2011Getting Started With Capacitive Touch Software Library Submit Documentation Feedback
Copyright?2011,Texas Instruments Incorporated
Example Projects https://www.360docs.net/doc/526107046.html, ?Objective of the Sample Application:To detect touch of one button(middle element),the application calls the TI_CAPT_Button()API function.The function returns logic one or zero to
indicate if there is a valid touch or not.This information is used to turn on the center LED on the
Capacitive Touch BoosterPack.The LED serves as a visual indicator of center button touch.
Between consecutive polling calls,the MSP430is placed into low-power mode(LPM3).Timer A0is
used to implement a delay timeout feature to wake up from LPM3into Active Mode.This delay is
programmable and can be adjusted in main.c source code file.
#define DELAY5000//Timer delay timeout count-5000*0.1msec=500msec
?Configuring the Sample Application:In main.c source code file,the compiler directive ELEMENT_CHARACTERIZATION_MODE should be commented out so that the application code
(rather than characterization code)is compiled.
//Comment to have this compiler directive run example application
//#define ELEMENT_CHARACTERIZATION_MODE
2.4Example Projects
Figure3shows the directory and the file structure for the associated files that are available for download with this application report.
?CCS:Contains Project folders and files for Code Composer Studio IDE
?IAR:Contains Project folders and files for IAR Embedded Workbench
?Library:Contains the Capacitive Touch Library Files(HAL and Application Layer)
?Examples:Each folder within has code examples that provide a starting point for developing applications on different MSP430families using various implementations.(Sample Application and
structure definition files).
The high-level API calls such as TI_CAPT_Custom(),TI_CAPT_Buttons(),etc.,consume more Flash
memory space but abstract the inner workings such as Baseline Tracking,Rate of Updates,Direction of Interest,etc.,from the Application layer.The resulting Application Layer is compact and any updates to the HAL or Layer functions do not require any modifications to the application code.
The low-level API calls such as TI_CAPT_Raw()can be used to achieve lower Flash memory code
footprint but features such as baseline tracking will have to be implemented manually in the application code.This scenario can possess an advantage for very low-memory devices and yet obtain very
low-levels of power consumption.
8Getting Started With Capacitive Touch Software Library SLAA491B–April2011–Revised July2011
Submit Documentation Feedback
Copyright?2011,Texas Instruments Incorporated
SLAC489
+- - - Documentation
+- - - Getting_Started_Projects
|
|+- - - Library
| CTS_HAL.c | CTS_HAL.h | CTS_Layer.c | CTS_Layer.h |
+- - - Examples
+- - - - -RO_PAIR_TA0| main.c | structure.c | structure.h |
+- - - RO_COMPAp_TA0_WDTp | main.c | structure.c | structure.h |
+- - - RO_COMPB_TA1_WDTA | main.c | structure.c | structure.h +- - - . . .+- - - . . .
+- - - Source
RO_PINOSC_TA0_WDTp_One_Button
main.c structure.c structure.h +--- CCS
| +--- RO_PINOSC_TA0_WDTp_One Button | +--- ...+--- IAR
+--- RO_PINOSC_TA0_WDTp_One Button +--- ...+---+--- https://www.360docs.net/doc/526107046.html, Example Projects
Figure 3.File and Directory Structure
9
SLAA491B –April 2011–Revised July 2011Getting Started With Capacitive Touch Software Library
Submit Documentation Feedback
Copyright ?2011,Texas Instruments Incorporated
Example Projects https://www.360docs.net/doc/526107046.html,
Table2.Description of the Example Projects
API Sensor Flash RAM Example Name Level Structure Description(bytes)(1)(bytes)(1)(2) RO_PINOSC_TA0_WDTp_Low Button(Middle Element)Turn the center LED on or off59618
One_Button_Compact based on middle element
touch
RO_PINOSC_TA0_WDTp_High Button(Middle Element)Turn the center LED on or off190014
One_Button based on middle element
touch
RO_PINOSC_TA0_WDTp_High Proximity Sensor Turn the center LED on or off190814
Proximity_Sensor based on proximity sensor
detection
RO_PINOSC_TA0_WDTp_High Wheel(Group of Five Turn the center LED on or off225432
Wheel_Buttons Buttons)based on the five wheel
buttons
(1)Code Composer Studio4.2.1IDE was used to generate the Flash and RAM memory allocation results.
(2)The default boot/rts stack size(0x50~80bytes)is not included in the RAM size.
2.5Project Setup in Code Composer Studio IDE
The Code Composer Studio(CCS)Integrated Development Environment(IDE)can be used to build,
download,and debug the project source code.
NOTE:Code Composer Studio v4.2.1with MSP430Code Generation Tools v3.3.3was used to
create the example projects.
1.Initiate Code Composer Studio,File→New CCS Project,and follow the steps through the New Project
Wizard to create a project for an example.For more information on new project setup,please refer to
the Code Composer Studio v4.2User's Guide for MSP430User's Guide(SLAU157)[7].
2.Select the appropriate target MCU device.In the case of the Capacitive Touch BoosterPack,select the
MSP430G2452MCU(as shown in Figure4).
Figure4.Code Composer Studio New Project Wizard–Target MCU Device Selection Step
10Getting Started With Capacitive Touch Software Library SLAA491B–April2011–Revised July2011
Submit Documentation Feedback
Copyright?2011,Texas Instruments Incorporated
https://www.360docs.net/doc/526107046.html, Example Projects
3.Ensure that the preprocessor/predefined symbol in the Project Build Options matches the target MCU
device(as displayed in Figure5).
Figure5.Code Composer Studio Project Properties Window–Predefined/Preprocessor Symbols
11 SLAA491B–April2011–Revised July2011Getting Started With Capacitive Touch Software Library Submit Documentation Feedback
Copyright?2011,Texas Instruments Incorporated
Example Projects https://www.360docs.net/doc/526107046.html,
4.Enable the GCC Extensions for the Project Build(as shown in Figure6).
?Go to Project→Properties to bring up the Project properties dialog.
?On left side,select C/C++Build.
?On right side,under Configuration Settings,select the Tab Tool Settings→MSP430Compiler→Language Options→Enable Support for GCC extensions(--gcc).
Figure6.Code Composer Studio Project Properties Window–Enable GCC Extensions Option
5.Link the Capacitive Touch Library(HAL and Layer)and the Example Project files(Main and Structure)
to the project:Project→Link Files to Active Project.For directory structure and file path,see
Section2.3.The Project configuration should look similar to Figure7.
Figure7.Code Composer Studio Project Explorer View(C/C++Tab)
12Getting Started With Capacitive Touch Software Library SLAA491B–April2011–Revised July2011
Submit Documentation Feedback
Copyright?2011,Texas Instruments Incorporated
https://www.360docs.net/doc/526107046.html, Example Projects
6.Add the path of the directories to the Include Path Option(as shown in Figure8).
Figure8.Code Composer Studio Project Properties Window–Include Options
7.Download and debug the example project:Target→Debug Active Project.
13 SLAA491B–April2011–Revised July2011Getting Started With Capacitive Touch Software Library Submit Documentation Feedback
Copyright?2011,Texas Instruments Incorporated
Example Projects https://www.360docs.net/doc/526107046.html, 2.6Project Setup in IAR Embedded Workbench IDE
The IAR Embedded Workbench(IAR)Integrated Development Environment(IDE)can be used to build, download and debug the project source code.
NOTE:IAR Embedded Workbench6.0with MSP430v5.20was used to create the example
projects.
1.Initiate IAR,Project→Create New Project,and follow through the steps of giving a new project name
with MSP430to create a new project.For more information on new project setup,see the IAR
Embedded Workbench Version3+for MSP430User's Guide(SLAU138)[8].
2.Select the appropriate target MCU device,Project→Options,General Options and Target Tab.In the
case of the Capacitive Touch BoosterPack,select the MSP430G2452MCU(as shown in Figure9).
Figure9.IAR Project Options–Target Device
3.Ensure that the preprocessor/predefined symbol in the Project Options→C/C++Compiler matches
the target MCU device(as displayed in Figure10).Add the path of the directories to the Additional
include directories input box.
Figure10.IAR Project Options–Preprocessor Options
14Getting Started With Capacitive Touch Software Library SLAA491B–April2011–Revised July2011
Submit Documentation Feedback
Copyright?2011,Texas Instruments Incorporated
https://www.360docs.net/doc/526107046.html, Example Projects
4.Select FET Debugger as the Debugger option to download and debug the example project(as shown
in Figure11).
Figure11.IAR Project Options–FET Debugger
5.Add the Capacitive Touch Library(HAL and Layer)and the Example Project files(Main and Structure)
to the project:Project→Add Files.The Project configuration should look similar to Figure12.
Figure12.IAR Project Explorer View
6.Download and debug the example project:Project→Download and Debug.
15 SLAA491B–April2011–Revised July2011Getting Started With Capacitive Touch Software Library Submit Documentation Feedback
Copyright?2011,Texas Instruments Incorporated
References https://www.360docs.net/doc/526107046.html,
3References
1.Capacitive Touch Library Programmer's Guide(SLAA490)
2.PCB-Based Capacitive Touch Sensing With MSP430(SLAA363)
3.MSP430Capacitive Single-Touch Sensor Design Guide(SLAA379)
4.MSP-EXP430G2LaunchPad Experimenter Board User’s Guide(SLAU318)
5.MSP430G2x52,MSP430Gx12Mixed Signal Microcontroller Data Sheet(SLAS722)
6.Capacitive Touch BoosterPack User’s Guide(SLAU337)
7.Code Composer Studio v4.2User's Guide for MSP430User's Guide(SLAU157)
8.IAR Embedded Workbench Version3+for MSP430User's Guide(SLAU138)
16Getting Started With Capacitive Touch Software Library SLAA491B–April2011–Revised July2011
Submit Documentation Feedback
Copyright?2011,Texas Instruments Incorporated
https://www.360docs.net/doc/526107046.html,
Appendix A Current Measurements
The current measurements for the example projects are presented in Table3.Note that these
measurements represent typical values(averaged)only.
Table3.Current Measurements for Example Projects
Example Name Configuration Voltage Current Range RO_PINOSC_TA0_WDTp_One Middle Element Button 3.3V 2.4μA Touch One_Button_Compact
Scan Time=500msec 3.0V 2.0μA
WDT source=ACLK/64 2.5V 1.4μA
ACLK=VLO(~12kHz) 1.8V0.9μA
Gate Time~5.3msec/element
RO_PINOSC_TA0_WDTp_One Middle Element Button 3.3V 2.6μA Touch One_Button
Scan Time=500msec 3.0V 2.1μA
WDT source=ACLK/64 2.5V 1.7μA
ACLK=VLO(~12kHz) 1.8V1μA
Gate Time~5.3msec/element
RO_PINOSC_TA0_WDTp_STRUCTURE_CONFIG_0(1) 3.3V 2.5μA 1.5cm Proximity_Sensor
Scan Time=500msec 3.0V2μA1cm
WDT source=ACLK/64 2.5V 1.5μA0.5cm
ACLK=VLO(~12kHz) 1.8V 1.1μA Touch
Gate Time~5.3msec/element
RO_PINOSC_TA0_WDTp_STRUCTURE_CONFIG_1(1) 3.3V9.5μA 2.5cm Proximity_Sensor
Scan Time=500msec 3.0V8μA2cm
WDT source=ACLK/512 2.5V6μA 1.8cm
ACLK=VLO(~12kHz) 1.8V3μA 1.5cm
Gate Time~42.6msec/element
RO_PINOSC_TA0_WDTp_STRUCTURE_CONFIG_2(1) 3.3V20μA 3.5cm Proximity_Sensor
Scan Time=500msec 3.0V17.5μA3cm
WDT source=SMCLK/8192 2.5V14μA 2.8cm
SMCLK=DCO(~1MHz) 1.8V9μA 2.5cm
Gate Time~65.5msec/element
RO_PINOSC_TA0_WDTp_Four Wheel Buttons+ 3.3V8.5μA Touch Wheel_Buttons
One Middle Element Button 3.0V7μA
Scan Time=500msec 2.5V 4.8μA
WDT source=ACLK/64 1.8V 2.6μA
ACLK=VLO(~12kHz)
Gate Time~5.3msec/element
(1)The compiler directive for the structure configuration should be defined at the top of structure.c source file.
Current Measurement Setup:
?On the LaunchPad,remove all Jumpers on J3:V
,TXD,RXD,RST and TEST.
CC
?On the LaunchPad,remove resistor R34,the pull-up resistor on P1.3and pushbutton switch S2.
NOTE:R34removal is necessary for low-current measurements.
?If a pull-up resistor is required,configure the Port registers on P1.3to use the internal on-chip pull-up resistors.
17 SLAA491B–April2011–Revised July2011Getting Started With Capacitive Touch Software Library Submit Documentation Feedback
Copyright?2011,Texas Instruments Incorporated
IMPORTANT NOTICE
Texas Instruments Incorporated and its subsidiaries(TI)reserve the right to make corrections,modifications,enhancements,improvements, and other changes to its products and services at any time and to discontinue any product or service without notice.Customers should obtain the latest relevant information before placing orders and should verify that such information is current and complete.All products are sold subject to TI’s terms and conditions of sale supplied at the time of order acknowledgment.
TI warrants performance of its hardware products to the specifications applicable at the time of sale in accordance with TI’s standard warranty.Testing and other quality control techniques are used to the extent TI deems necessary to support this warranty.Except where mandated by government requirements,testing of all parameters of each product is not necessarily performed.
TI assumes no liability for applications assistance or customer product design.Customers are responsible for their products and applications using TI components.To minimize the risks associated with customer products and applications,customers should provide adequate design and operating safeguards.
TI does not warrant or represent that any license,either express or implied,is granted under any TI patent right,copyright,mask work right, or other TI intellectual property right relating to any combination,machine,or process in which TI products or services are https://www.360docs.net/doc/526107046.html,rmation published by TI regarding third-party products or services does not constitute a license from TI to use such products or services or a warranty or endorsement https://www.360docs.net/doc/526107046.html,e of such information may require a license from a third party under the patents or other intellectual property of the third party,or a license from TI under the patents or other intellectual property of TI.
Reproduction of TI information in TI data books or data sheets is permissible only if reproduction is without alteration and is accompanied by all associated warranties,conditions,limitations,and notices.Reproduction of this information with alteration is an unfair and deceptive business practice.TI is not responsible or liable for such altered https://www.360docs.net/doc/526107046.html,rmation of third parties may be subject to additional restrictions.
Resale of TI products or services with statements different from or beyond the parameters stated by TI for that product or service voids all express and any implied warranties for the associated TI product or service and is an unfair and deceptive business practice.TI is not responsible or liable for any such statements.
TI products are not authorized for use in safety-critical applications(such as life support)where a failure of the TI product would reasonably be expected to cause severe personal injury or death,unless officers of the parties have executed an agreement specifically governing such use.Buyers represent that they have all necessary expertise in the safety and regulatory ramifications of their applications,and acknowledge and agree that they are solely responsible for all legal,regulatory and safety-related requirements concerning their products and any use of TI products in such safety-critical applications,notwithstanding any applications-related information or support that may be provided by TI.Further,Buyers must fully indemnify TI and its representatives against any damages arising out of the use of TI products in such safety-critical applications.
TI products are neither designed nor intended for use in military/aerospace applications or environments unless the TI products are specifically designated by TI as military-grade or"enhanced plastic."Only products designated by TI as military-grade meet military specifications.Buyers acknowledge and agree that any such use of TI products which TI has not designated as military-grade is solely at the Buyer's risk,and that they are solely responsible for compliance with all legal and regulatory requirements in connection with such use. TI products are neither designed nor intended for use in automotive applications or environments unless the specific TI products are designated by TI as compliant with ISO/TS16949requirements.Buyers acknowledge and agree that,if they use any non-designated products in automotive applications,TI will not be responsible for any failure to meet such requirements.
Following are URLs where you can obtain information on other Texas Instruments products and application solutions:
Products Applications
Audio https://www.360docs.net/doc/526107046.html,/audio Communications and Telecom https://www.360docs.net/doc/526107046.html,/communications
Amplifiers https://www.360docs.net/doc/526107046.html, Computers and Peripherals https://www.360docs.net/doc/526107046.html,/computers
Data Converters https://www.360docs.net/doc/526107046.html, Consumer Electronics https://www.360docs.net/doc/526107046.html,/consumer-apps
DLP?Products https://www.360docs.net/doc/526107046.html, Energy and Lighting https://www.360docs.net/doc/526107046.html,/energy
DSP https://www.360docs.net/doc/526107046.html, Industrial https://www.360docs.net/doc/526107046.html,/industrial
Clocks and Timers https://www.360docs.net/doc/526107046.html,/clocks Medical https://www.360docs.net/doc/526107046.html,/medical
Interface https://www.360docs.net/doc/526107046.html, Security https://www.360docs.net/doc/526107046.html,/security
Logic https://www.360docs.net/doc/526107046.html, Space,Avionics and Defense https://www.360docs.net/doc/526107046.html,/space-avionics-defense Power Mgmt https://www.360docs.net/doc/526107046.html, Transportation and https://www.360docs.net/doc/526107046.html,/automotive
Automotive
Microcontrollers https://www.360docs.net/doc/526107046.html, Video and Imaging https://www.360docs.net/doc/526107046.html,/video
RFID https://www.360docs.net/doc/526107046.html, Wireless https://www.360docs.net/doc/526107046.html,/wireless-apps
RF/IF and ZigBee?Solutions https://www.360docs.net/doc/526107046.html,/lprf
TI E2E Community Home Page https://www.360docs.net/doc/526107046.html,
Mailing Address:Texas Instruments,Post Office Box655303,Dallas,Texas75265
Copyright?2011,Texas Instruments Incorporated
易捷通触摸屏收款机使用说明书
前言 非常感谢您选用易捷通触摸屏系列产品,本手册适用于易捷通生产的部份触摸屏产品。在安装和使用产品之前,请您详细阅读本手册,以便您对它的性能有深入的了解。请保存好此手册,将来如果您遇到使用问题时以便参考。 本公司为改进产品,将尽可能采用新技术、新元器件。因此本公司有权更改而不另行通知。本手册所描述的特性、功能和操作也许与本公司在各地所销售机器的性能并不完全一致,有些情况下,图片只是设备原型,在使用本手册前,应向本公司或经销商询问当前适用的资料。 本手册只适用于在中国境内使用的易捷通部分触摸屏。本手册包括截止到该手册印刷时的最新信息。本公司全权负责该手册的修订与说明,并保留该手册印刷后更改产品而不另行通知的权利。本手册中部分示意图,仅供参考,若图片与实物不符,请以实物为准。 本设备必须由售后服务人员或经销商进行安装。对于未经授权对本设备的更改、不按规定替换连接设备及电缆所造成的一切后果,本公司不负任何责任。 本手册最终解释权归深圳市易捷通科技有限公司所有 2013年3月
目录 一、安全使用注意事项---------------------------------------------------3 二、初始安装---------------------------------------------------------------4 三、触摸屏外型--------------------------------------------------------5-7 四、产品说明 (1)、液晶品牌和型号以及技术参数的说明----------------- 7 (2)、触摸屏型号以及技术参数的说明------------------------8 (3)、主板接口图一--------------------------------------------9-10 (4)、主板接口图二-------------------------------------- --------11 五、双屏系统设置 (1)、BIOS双屏显示设置-----------------------------------12-14 (2)、 WindowsXP系统双屏显示设置---------------------14-18 六、软件操作指南 (1)、触摸屏驱动安装--------------------------------------19-24 (2)、触摸设置及应用---------------------------------------25-27 七、常见问题-------------------------------------------------------------28 八、保修条款--------------------------------------------------- ---------29
笔记本电脑触摸板使用技巧
笔记本电脑触摸板使用技巧 1、国内笔记本电脑内置的触控板使用方法有很多还没有发挥出来,这对新手来说是有必要学一学的,最好不要依赖外置鼠标(就是现代主流的有线鼠标和无线鼠标)。由于外形鼠标随身带很不方便,因此使用笔记本电脑的朋友就必须习惯用笔记本内置的触摸板,发挥触摸板的使用技巧,以提高工作效率。 2、触摸板是由一块能够感应手指运行轨迹的压感板和两个按钮组成,两个按钮相当于标准鼠标的左键和右键。触控板的功能可扩展为手写板,可进行手写汉字输入。 3、在电脑桌面依次点击‘开始’→‘控制面板’→‘鼠标’,如下
图可进行设置 4、使用方法:首先讲一下,当你使用外接鼠标时,在键盘操作时不小心触碰到触摸板,这时,你可以关闭触摸板,触摸板的开关组合键‘Fn’+功能键‘F1~F12’其中,如下图所示。注意:只有部分的笔记本电脑才支持用组合键关闭触摸板。
5、如果不支持组合键关闭触摸板,就打开鼠标设置窗口,到‘装置设定值’选项卡,如下图,将连接外部USB。。。一项打勾,确定即可。只要你插上外置鼠标,该触摸板就自动关闭了。(需要安装Synaptics驱动,驱动可到官方网站下载) 6、图中,如何把‘将连接外部USB。。。’一项打勾去掉,设定值就可用。因为它是对触摸板设定有效,对外置鼠标是无效的。(注意:使用无线鼠标,因为其中的无线适配器插在电脑上,所以触摸板程序是检测不到鼠标是否在用的,它不管无线鼠标是否在休眠状态)
7、1.鼠标移动:用单指触摸触摸板并移动相当于移动鼠标,轻敲触摸板相当于鼠标左键单击,轻敲两次相当于鼠标左键双击。 2.鼠标拖动:用单指轻敲触摸板二次,轻敲后单手指放在触摸板上不要放开,此时就相当于鼠标拖动操作,移动单手指即可拖动,直到手指离开触摸板就会停止拖动。 3.鼠标滚动: 方法一:用手指在触摸板的底边左右移动、右边上下移动,相当于拖动滚动条。(适用于不支持多点触摸的触摸板); 方法二:用两个手指在触摸板上左右移动、上下移动,相当于拖动滚动条。(适用于支持支持多点触摸的触摸板)。 图中所示的是触摸板已安装驱动程序且带有的触摸使用教程,可在上
海泰克(HITECH)6600S和6600T系列人机界面使用手册
海泰克6600S和6600T系列人机界面使用手册:一:首先要设置好屏上的指拨开关功能: SW1、SW2:显示类型。 出厂默认为SW1=ON;SW2=ON 。 SW3、SW4:运行模式。 执行使用者应用模式SW3=ON;SW4=ON。 SW5:通讯参数。 与PLC通讯格式按照硬件系统设置时SW5=ON;与PLC通讯格式按照软件系统设置时SW5=OFF。SW6:密码设置。 要求输入密码时SW6=ON; 不要求输入密码时SW6=OFF。 SW7:系统菜单。 开机后只显示系统菜单时SW7=ON; 开机后直接进入运行模式时SW7=OFF。 SW8:默认用户等级。 开机时密码等级设为1时SW8=ON; 开机时密码等级设为3时SW8=OFF。 SW9:COM1通讯方式。 COM1为RS485通讯方式时SW9=ON; COM1为RS422通讯方式时SW9=OFF。 SW10:COM2通讯方式。 COM2为RS485通讯方式时SW10=ON; COM2为RS422通讯方式时SW10=OFF。
二:将触摸屏背后的7号拔码开关拔至ON位置,这样送电可进入系统目录 ,进入系统目录后,按F2,设置“Dow nload /updata......”选项里选择COM1口(9针上传);选择COM2口(25针)上传都是可以的,二选其一。 三:选对通讯口后,将电脑与触摸屏连接,打开触摸屏软件,“文件”----- “上载应用”,屏上会跳出密码界面,初始码为222183600或是0 0000000,密码正确后会自动跳转到上传界面进行上传。 四:上传完成后,在触摸屏软件中“文件”-----“重建应用文件”---打开上传的文件将其转换成RCP- r.v6f格式的文件即可完成上载。
ADP 触摸屏说明书
HITECH系列触摸屏ADP6软件使用说明 ADP6软件采用“所见即所得”、“对象导向”理念,实现“拖曳式”编辑。 一、建立新的工程文件 点击菜单中文件→新建或点击快捷工具栏中的打开新文件图标,弹出工作参数对话框,选择人机界面种类和PLC种类(视使用的人机和PLC种类选择,本训练使用PWS6600 Color标准型和Simatic S7200 PPI),其他内容默认。新文件建立之后“确定”即可进入画面编辑。 图1 设定工作参数 二、画面编辑 当前画面为画面1,如需要设计多画面,在菜单中点击画面→新建画面,弹出产生新画面对话框,增加画面2,可以填写画面名称,确定后即为当前画面,其他画面依此方法操作。通过点击画面→画面管理员,显示画面大纲,双击某画面或选中后使用右键弹出菜单→开启画面就可设为当前画面,也可使用快捷按钮在上下画面间切换。 单击查看→放大画面,选择一定比例使画面大小合适。 在HITECH系列触摸屏中,可使用的画面元件有下列几类: ①可触摸元件指在画面上定义的按钮(开关)、切换画面的按键,这些元件一般兼有可触摸功能、数据输入功能和显示功能。
②状态显示元件指在画面上定义的状态灯(指示器)、动态字符信息显示等,触摸这些元件时系统没有反应,仅仅被用作信号的运行状态显示。 ③动态资料及人机记录缓冲区显示元件指在画面上定义的图表(棒图、折线图、圆形图、仪表盘、条形统计图、圆形统计图、折线统计图)或人机界面使用PLC内存作记录缓冲区状态显示元件(历史趋势图、表)。 ④静态显示元件指在画面上定义的静态文字、静态图形(直线、圆、矩形、文字等)背景元件,不受PLC程序控制。 除静态显示元件外,画面元件和PLC控制程序相关,画面元件地址为PLC 内部存储器(位)、变量存储器(字、双字)地址,并出现在PLC程序中,可触摸元件为输入元件,其他为输出元件。 (1)按钮 功能 设ON按钮:按一次对应接点设为ON,手放开或再按仍为ON。 设OFF按钮:按一次对应接点设为OFF,手放开或再按仍为OFF。 交替型按钮:按一次按钮该接点设为ON,手放开仍为ON;再按一次OFF。 保持型按钮:按住此按钮该接点ON,手放开OFF。 复状态按钮:如此按钮有3个状态,按一次按钮送 S0 信号给PLC,再按一次按钮送 S1 信号给PLC,再按一次按钮送 S2信号给PLC,此按钮 可正循环动作(S0→S1→S2→S0)或反循环动作(S0→S2→S1→S0)。 状态数最多可达256个。 设值按钮:触摸此按钮,人机马上就送出指定的常数值给PLC相对应之缓存器。加/减值按钮:触摸此按钮,人机马上先从PLC读取缓存器的内容值并加/减所设数值,再将运算结果写至PLC相对应之缓存器。 换画面按钮:按一次该按钮,人机直接切换到指定画面。属性中—“指定生效位” →当指定的位条件成立才能换页。“认知警报”→表示人机已经收 到目前所发生的警报讯息。“通知”→换画面的同时,触发一接点。回前一画面:按一次该按钮,人机就切换回屏幕先前一次显示的画面。 数据转文字文件:可将记录缓冲区,配方数据,警报历史文件,警报频次文件等数据转成文字文件(*.PRN)存档,亦可由EXCEL,WORD,记事本等 文书软件读出。(SoftPanel 才提供) 功能按钮:在功能键中包含下列17种选项,从对比度上升到执行应用程序等。 对比度上升按该按钮,人机屏幕对比增加。(SoftPanel 不提供) 对比度下降按该按钮,人机屏幕对比减少。(SoftPanel 不提供) 保存对比度按该按钮,人机储存对比。(SoftPanel 不提供) 密码表按一次该按钮,人机就显示系统密码表的窗口。LEVEL=1才能操作。 重新输入密码按一次该按钮,人机就显示重新输入密码的窗口。 设为最低用户等级按一次该按钮,人机系统就切换为密码最低等级 LEVEL=3。 打印画面按一次该按钮,人机就会打印实际应用时此画面的指定打 印区域(HARDCOPY方式)。 回系统目录按一次该按钮,人机就切换回到系统目录画面。LEVEL=1 才能操作。 关闭背灯按一次该按钮,人机就关闭屏幕背灯。(SoftPanel 不提
触摸屏的操作方法步骤
触摸屏显示器,以及外置的手写板,甚至有些笔记本电脑上充当鼠标的触控板也可以当作触摸屏使用。并且如果设备支持,用户还可以同时使用多根手指执行操作,这也就是现在非常热门的多点触摸功能。 工具/原料 计算机 触摸屏 方法/步骤 打开“开始”菜单,在“计算机”上单击鼠标右键,在弹出的快捷菜单中选择“属性”,打开系统属性窗口。在“系统”类别下,有一个名为“笔和触摸”的属性,只要这里显示为“可用”,那么就表示这台计算机是支持触摸操作的,如果显示为“单点触摸”,表示这台计算机支持单点触摸,也就是可以使用一根手指进行操作;如果显示为“多点触摸”,则表示这台计算机支持多点触摸,可同时使用两根或更多根手指进行操作。 单击左右键操作实现后,还有一个比较棘手的问题,那就是鼠标的指向操作在使用致标时,将鼠标指针指向屏幕上的文件,系统会自动用屏幕提示的方式显示有关该文件的相关信息。但在使用触摸方式操作时,这种指向操作就不太容易实现了。如果设备使用了电磁感应式触摸屏,那么把触控笔悬停在屏幕上方lcm左右的距离,即可实现“指向”操作;不过现在很多设备,尤其是多点触摸设备,大部分使用了压感式屏幕,要求必须将手指紧贴屏幕表面才能生效,这种情况下如何进行“指向”,而不是“左键单击” ? 打开“控制面板”,依次进入“硬件和声音”一“笔和触摸”,打开“笔和触摸”对话框切换到“碰”选项卡,在“触摸指针”选项下,选中“与屏幕上的项交互时显示触摸指针”。 单击“高级选项”按钮,打开高级选项对话框,在这里可按需要对屏幕上显示的虚拟鼠标进行设置,例如左手或右手习惯、虚拟鼠标的透明度和大小,以及光标的移动速度等,设置完毕单击“确定”按钮,关闭所有打开的对话框 在经过上述设置后,在使用手指或触控笔点击屏幕后,碰触点周围就会出现一个虚拟的鼠标图案,随后可以用手指或触控笔拖动这个鼠标,以移动指针,或者点击该鼠标的左右键,实现鼠标单击操作 本文源自大优网https://www.360docs.net/doc/526107046.html,
步科触摸屏常见问的题目
目录 前言 ........................................................................................................................ 错误!未定义书签。一.软件类问题. (6) 1. EV5000软件能在Vista或Win7系统下运行 (6) 2. 如何在线修改用户等级密码,IP地址,波特率等系统参数? (7) 3. 用户权限和用户等级的区别? (10) 4. HMI的上传密码忘记了怎么办?在线修改的密码忘记了怎么办? (10) 5. 离线模拟的时候为什么不能修改系统时间? (11) 6. 任务栏是否可以去掉?如何弹出快选窗口? (11) 7. EV5000软件新建工程后系统自带的窗口分别有什么作用,可以删掉吗?. 12 8. 如何使用操作员确认功能? (14) 9. 打开工程时,提示:【系统不存在的字体文件】怎么办? (15) 10. HMI能支持什么语言? (16) 11. 报警和事件的区别? (16) 12. 报警和事件显示元件里面的地址怎么设置?报警和事件查询怎么做? (16) 13. 事件查询为什么记录少一条? (17) 14. 如何让事件记录里面的时间和PLC里面的时间同步? (18) 15. 为什么选择了存储但是历史事件存储不了? (19) 16. 如何清除事件显示? (19) 17. 如何防止HMI里面的程序被上传? (20) 18. 如何更换HMI型号以及注意事项? (21)
19. 如何更换PLC类型,程序会丢失吗? (22) 20. 怎么更换串口? (24) 21. 如何同时打开多个工程/跨工程复制粘贴? (24) 22. HMI的LOGO图片能更换成其他图片? (25) 23. 如何屏蔽系统报警信息PLC No Responnse? (27) 24. 如何屏蔽系统报警信息Socket Connect Error? (27) 25. HMI提示RTC Device error的原因和处理方法 (28) 26. 系统信息如何自定义?例如把PLC No Response改为:通讯无响应 (28) 27. 系统滚动条的宽度如何设置? (29) 28. 如何使用软件自带的群组键盘?如何输入中/英文? (30) 29. 如何使光标在数值输入元件/文本输入元件之间随意移动? (34) 30. 是否支持反编译功能?HMI里上传的PKG文件反编译时会出现(1.3以下版本无法反编译)的对话框,要如何解决? (36) 31. 如何实现多语言切换? (36) 32. 显示负数少了一位,这是怎么回事,需要怎么设置? (39) 33. 如何对单个元件进行加密? (39) 34. 如何实现比例转换? (40) 35. 如何用PLC地址控制画面切换? (41) 36. 用PLC控制实现画面切换,为何不能再次进入设置的画面? (43) 37. 内部节点(如LB,LW,RB,RW等)的含义? (43) 38. 如何清除RW区域? (44) 39. EV5000软件里面棒图支持浮点数吗? (45)
工控产品连线接线图
深圳市吉庆电子有限公司 工程部 2008-04-15
工控产品通讯连线接线图 一、说明如下: 1.8S-----------------8针S端子 2.5S-----------------5针S端子 3.9公--------------- DB9公头 4.9母--------------- DB9母头 5.25公-------------- DB25公头 6.25母-------------- DB25母头 二、端子的引脚定义: 三、工控产品通讯线定义如下: 1.三菱PLC 台达TP04 (8S)(9母) 7―――――――――――――6 4―――――――――――――7 1―――――――――――――9 2―――――――――――――8 2.PC 台达PLC (9母)(8S) 2―――――――――――――-5 3――――――――――――――4 5――――――――――――――3
3.三菱PLC 台达触摸屏(人机界面/DOP) (8S)(9母) 4――――――――――――――1 7――――――――――――――2 2――――――――――――――3 1――――――――――――――4 3――――――――――――――5 4.台达PLC 台达触摸屏(HMI) (8S)(9公) 5―――――――――――――2 4―――――――――――――3 8―――――――――――――5 5.PC 台达TP04 (9母)(9母) 2―――――――――――――3 3―――――――――――――2 5―――――――――――――5 6.台达PLC 台达TP04 (8S)(9母) 5―――――――――――――2 4―――――――――――――3 8―――――――――――――5 7.PC 台达人机界面 (9母)(9公) 7―――――――――――――8 8―――――――――――――7 5―――――――――――――5 2―――――――――――――3 3―――――――――――――2
触摸屏plc一体机使用手册
第二代触摸屏plc一体机操作步骤 第二代触摸屏plc一体机的用户说明书发展越来越迅速,市场空间越来越大。教育行业需求一日比一日多,商业连锁店也大量上此产品,企业会议再也不用投影,而是转型到触摸一体机,政务部门都在争先恐后的上触摸一体机互动广告机。 那么第二代触摸屏plc一体机为什么这样受众人追捧? 而这个行业的领袖商、 触派电子,又为什么也是很多人选购触摸一体机的对象。 那么今天我们从第二代触摸一体机构建的触摸屏说起。 第二代触摸屏plc一体机核心组成部分是触摸屏。 那么在说触摸一体机组成的触摸屏之前,我重点在解说下四种触摸屏。 触摸屏分四种性质的,是根据它们的物理原理而得的。 红外触摸屏技术特点不做过多的解释。主要谈它的应用。 红外触摸屏不受环境影响。不怕污渍,不怕水,不怕长时间点击,不
怕风。而且4四种触摸屏种,只要红外触摸屏才能做大尺寸的。什么叫大尺寸,这里我定义为32寸以上的。只有红外触摸屏才能做32寸以上的,现在市面上红外触摸屏能做到200寸甚至以上。 而且它还有一个特点,然后物体都可以触摸,他是靠红外灯光发色红外线技术产生触摸的。只要是物体在上面触摸,就是将亮变暗。只要里面灯管不坏,就一直能精准触摸。寿命至少在6000万次点击。 品牌 行业领袖 用红外触摸屏行业最顶级的技术厂家。(触派)可以精准定位触摸,不受环境影响。可以做到4点,6点,8点,32点等等以上。 这里还普及下多点。特别提醒多点是在win7 系统,软件商自行开发的软件下,才能看出多点效果。如果在系统下面其实只是替代一个鼠标作用。最多在画图软件下,才能看出多少点。如果说8点,就8个手指同时画。看线画的流畅不流畅,有没有跳动。如果画线流畅,不跳动,那么这个触摸屏就2014年中考冲刺综合复习指导北京地区试题广东地区试题江苏地区试题很好。 电容触摸屏直接被大尺寸触摸一体机淘汰掉?为什么行业领导品牌 触派电子不采用电容屏?
触摸屏控制器使用说明书
一. 触摸屏控制器型号:FX-TK04U;FX-TK04R;FX-TK05U;FX-TK05R 信息发布内容: 1)深圳方显科技触摸屏控制器可用于任何四线、五线电阻屏,11位AD转换,分辨率可到2048*2048。RS232/USB接口可选。简单的通讯指令即可实现触摸功能。支持操作系统:MS-DOS,WINDOWS3.X/9X/ME/NT/2000/XP/CE,LINUX单片机专用触摸屏控制器,车载专用触摸屏控制器,直接提供菜单式操作,大大节约嵌入式MCU资源;MCU专用接口,使您的产品无须改动直接接入触摸屏控制。 2) 深圳方显科技4线触摸屏控制器产品概述FX-TK04R/FX-TK04U 触摸屏分辨率:2048x2048 4点定位 25点定位 支援鼠标右键 支援画线测试 驱动程序包括:Windows 98, 2000, NT4, Me, XP, XP Tablet Edition, CE 2.12, CE 3.0, https://www.360docs.net/doc/526107046.html,, Linux, DOS & iMac 多语系的操作窗口 支援多个监视器 具备视觉旋转度 触摸屏通讯接口:RS232 或USB 计算机通讯接口:Pin Header 电气参数 电源要求: +5VDC ( Maximum 100mA, typical 70mA, 50mV peak to peak maximum ripple) 工作温度: 0 to 50℃ 贮存温度: -40 to 80℃ 湿度: 95% at 60℃ 通讯协定:RS232 Model: 9600 bauds, None parity, 8 data bits, 1 stop bit USB Model: USB 1.1 Low speed 采样速度:RS232 Model: Max. 160 points/sec USB Model: Max. 160 points/sec 最大按压延迟时间: Max. 35 ms 出线顺序: X+, Y+, X-, Y- 电阻范围: 200 ~ 900 ohm ( pin to pin on the same layer 3) 单片机专用触摸屏控制器FX-TK04RMCU 深圳方显科技是国内著名显示及触控产品的专业厂商。依靠其强大的研发能力,开发出多款LCD控制器和触摸屏控制器。LCD控制器使得单片机、DSP、各种嵌入式CPU轻松实现LCD (TFT)显示。触摸屏控制器有连笔型和点触型两种。连笔型触摸屏控制器支持4线、5线各尺寸电阻触摸屏。点触型触摸屏控制器可连接各类MCU、单片机、DSP、ARM等嵌入式系统,为不同的客户确定最佳应用。使用点触型触摸屏控制器,开发工程师不再需要详细了解触摸屏工作原理,做复杂的编程,只需简单读取触摸XY位置信息,快速完成研发工作。也可根据不同MCU的特点及不同的功能,为客户定制程序使得各种MCU均能轻松接上触摸屏,实现各具特色的人机接口。
TFT触摸屏使用说明
2一、.4寸TFT 触摸屏使用说明 要正确使用TFT 触摸屏,需要借助相应的单片机实验板,这里,以顶顶电子开发板DD-900实验开发板为例进行介绍,值得庆幸的是,DD-900上设有3V 电压输出端,因此,可以方便地为TFT 触摸屏供电。 TFT 触摸屏模块介绍 随着TFT 触摸屏价格的不断下降,其应用也越来越广泛,学习TFT 触摸屏现已成为一种时尚,以前,很多人只有在ARM 单片机中才能看到TFT 触摸屏的风采,现在,随着51单片机性能的提高,51单片机也能玩TFT 触摸屏了,这里,我们介绍的是一款2.4寸TFT 触摸屏模块,其正面与反面外形如图所示: 这款触摸屏模块主要具备如下特点: 1.2.4寸320*240 ,65K/262K 色; 2.屏带PCB 板, PCB 板设有2.4寸液晶屏、SD 卡座、触摸屏控制芯片ADS7843,通过40脚插针将屏、卡座和触摸芯片功能引脚,引脚间距为2.54mm ,采用杜邦线可十分方便地与单片机进行连接。PCB 引出脚排列及功能如图所示:
3.屏设置为8位,用户也可根据实际情况设置为16位。 4.控制IC 为ILI9325。 二、供电及连接说明 DD-900实验开发板采用的是5V 供电,因此,单片机应采用5V 单片机,如STC89C516RD+、STC12C5A60S2等,晶振采用30M ,注意TFT 要采用3V 供电,否则有可能烧屏,TFT 与单片机连接时可加限流电阻,电阻大小为470欧左右,也可以不加,但单片机不可设置为推挽模式,各引脚连接如下: TFT 触摸屏 DD-900实验开发板 说明 GND GND 屏与背光供电 VCC 3V LED+ 3V DB8~DB15 P00~P07 液晶屏部分 DB0~DB7 不连接(这里采用是8位方式,不用连接) RS P26 WR P25 RD P24 CS P27 RES P23 D_CLK P21 触摸控制部分 D_CS P20 D_DIN P22 D_BUSY P34 D_DOUT P33 D_Penirq (中断) P35 SD_OUT 根据程序进行定义 SD 卡座部分 (前两个实验,此部分未采用) SD_SCK 根据程序进行定义 SD_DIN 根据程序进行定义
触摸屏说明书
触摸屏使用方法: 触摸区控制是与按钮控件结合在一起的,根据用户在配套软件中的按钮控件设置,当用户点击在该按钮触摸区处时,可指定连接下一页面、发送控件ID 号或者发送坐标值。用户点击在非按钮触摸区时,人机界面终端将不进行任何操作。 发送控件ID号时,前2个字节为“FC FC”为数据帧头,表示发送的数据为触摸屏数据,后面2个字节为控件ID号,低字节在前,高字节在后。 发送坐标值时,前2个字节为“FE FE”为数据帧头,表示发送的数据为触摸屏数据;后面4个字节为触摸屏x、y坐标数据,x坐标在前,y坐标在后,同样低字节在前,高字节在后。 若多层显示时,触摸区控制操作页面默认的是最近一次进行调用操作的页面,此时如果想激活其它的页面,则使用1B 33指令进行操作页面更改。 触摸屏所点之处都有鼠标显示,如果不想显示,可用命令1B 30 00 FF FF EE FF 关掉显示。 触摸屏模式选择命令 格式∶十六进制码∶ 1B 20 MODE FF FF EE FF 解释:1B:为命令帧头,20:为命令。MODE:为模式选择值,一个BYTE。 FF FF EE FF为帧结束。 MODE:0x00:表示单点触发,即按下触摸屏到抬起时只发送一次触摸屏通码 数值,抬起时无断码发送。 0x01:表示单点触发,即按下触摸屏到抬起时只发送一次触摸屏通码 数值,抬起时有断码发送。
如果在上位机按钮控件属性设置中设置为返回控件ID号,断码 为:FC F0 ID;ID为一个WORD,低字节在前高字节在后。 如果在上位机按钮控件属性设置中设置为返回当前点击的坐标 值,断码为:FE F0 X Y ;X,Y均为一个WORD,低字节在前高 字节在后。 0x02:表示连续触发,即按下触摸屏后一直不停地发送触摸屏数值,直到抬起,抬起时无断码发送。发送的每组触摸屏数据之间的 时间间隔可以用命令来控制,命令详见“发送触摸屏数据时间 间隔设置命令”。 0x03:表示连续触发,即按下触摸屏后一直不停地发送触摸屏数值,直到抬起,抬起时有断码发送。 如果在上位机按钮控件属性设置中设置为返回控件ID号,断码 为:FC F0 ID;ID为一个WORD,低字节在前高字节在后。 如果在上位机按钮控件属性设置中设置为返回当前点击的坐标 值,断码为:FE F0 X Y ;X,Y均为一个WORD,低字节在前高 字节在后。 发送的每组触摸屏数据之间的时间间隔可以用命令来控制, 命令详见“发送触摸屏数据时间间隔设置命令”。 例:选择触摸屏模式为单点触发不发送断码值(初始化为这种模式):1B 20 00 FF FF EE FF
易捷通触摸屏收款机使用说明书
前言 特不感谢您选用易捷通触摸屏系列产品,本手册适用于易捷通生产的部份触摸屏产品。在安装和使用产品之前,请您详细阅读本手册,以便您对它的性能有深入的了解。请保存好此手册,今后假如您遇到使用问题时以便参考。 本公司为改进产品,将尽可能采纳新技术、新元器件。因此本公司有权更改而不另行通知。本手册所描述的特性、功能和操作也许与本公司在各地所销售机器的性能并不完全一致,有些情况下,图片只是设备原型,在使用本手册前,应向本公司或经销商询问当前适用的资料。 本手册只适用于在中国境内使用的易捷通部分触摸屏。本手册包括截止到该手册印刷时的最新信息。本公司全权负责该手册的修订与讲明,并保留该手册印刷后更改产品而不另行通知的权利。本手册中部分示意图,仅供参考,若图片与实物不符,请以实物为准。
本设备必须由售后服务人员或经销商进行安装。关于未经授权对本设备的更改、不按规定替换连接设备及电缆所造成的一切后果,本公司不负任何责任。 本手册最终解释权归深圳市易捷通科技有限公司所有 201 3年3月 目录
一、安全使用注意事项 ---------------------------------------------------3 二、初始安装 ---------------------------------------------------------------4 三、触摸屏外型 --------------------------------------------------------5-7 四、产品讲明 (1)、液晶品牌和型号以及技术参数的讲明----------------- 7 (2)、触摸屏型号以及技术参数的讲明------------------------8 (3)、主板接口图一--------------------------------------------9-10 (4)、主板接口图二--------------------------------------
触摸屏安全密码
触摸屏安全密码 安全等级是用来设定不同用户的访问权限,可大大提高应用工程的安全性。只有拥有高级别密 码的用户才能访问高安全等级窗口,大大提高了应用工程的安全性。 我们在设置窗口属性时,可以看到有安全等级一栏。也就是说,我们可以对任何窗口设计它的 安全等级,如下图所示: 但请注意:安全等级只对基本窗口有效,对于其它窗口是无效的。一个工程一共有3 个安全等 级,分别是高(2 级),普通(1 级),低(0 级)。在新建一个窗口时,这个窗口默认的安全等级是 低。在 [HMI 属性]里您可以设置安全等级的每一级别的密码。当处于高安全等级时,可以访问安 全等级低的窗口,而处于低安全等级时,是不可以访问安全等级高的窗口。这样有助于安全处理, 比如可以把重要的开关都设置在高安全等级的窗口中,这样一般的用户进入后就不能访问这些重要 的开关了,必须输入高安全等级的密码才可以访问这些内容。 下面我们来举个关于安全等级使用的例子:首先选择[文件]/[新建工程],新建完工程后,双 击工程结构窗口的HMI,在 [HMI 属性]里,触摸屏扩展属性页,设置3 个级别的密码,我们将1 级密 码设为1111。如下图所示: 系统保留寄存器LW9042 是用来显示当前基本窗口的安全等级。我们只能读取系统保留寄存器 LW9042,但不能写入LW9042,创建一个数值显示元件,把它放在窗口0,用来显示当前安全等级。 第十二章安全等级 257 如下图所示: 整个工程为下图: 存盘,编译,离线模拟运行,如下图所示: 因为并没有输入任何密码,所以工程运行时当前等级一定为0。现在跳到窗口4,并将窗口属性 中的密码等级设为普通(1 级),如下图所示: 第十二章安全等级 258 在窗口0 中创建一个功能键,属性设计如下: 存盘,编译,离线模拟运行,如下图所示: 第十二章安全等级 259 按下功能键按钮,却不能切换到窗口4。那是因为当前等级为0,而窗口4 的等级为1,处于低
触摸屏使用说明书
电炉触摸屏使用说明书 ( M T4500T型)
一.前言 随着国民经济和社会科学的不断发展,特别是计算机技术、信息采集技术的日新月异,使得与之相关的自动控制技术日趋智能化、网络化、成熟化,它以自身的高可靠性、高精确度及高效率等特点为众多企业所重视并加以采用,在各行各业中发挥着巨大作用。 根据冶金行业的冶炼设备的发展,触摸屏式的人机对话方式已经获得广大使用者的青睐,它以生动的直观,快捷,准确的方式将设备的工作状态传递给操作人员,及操作人员又能迅速的将控制指令传递给使用的设备,使得操作过程显得简洁,易控. 我公司尊着用户至上技术第一的原则,以将这一先进技术应用到去本公司的大部分产品.欢迎广大用户使用. 二.简介 2.1本公司采用的触摸屏型号有M T4500T和M T510T两种.操作方法大同小异.本书主要介绍M T4500T的使用方法 2.2该型号的触摸屏共设计有九个画面. 1):启始画面. 2):主画面. 3)历史趋势图. 4)时实趋势图. 5)高压柜和变压器. 6)液压站. 7)事件画面. 8)报警画面. 9)仪表板. 当然还可以根据用户的要求增加和减少.下面将一一介绍各画面的功能,怎样进入,和操作. 三操作方法
3.1当由维修人员给设备接通电源后,触摸屏即被点亮,出现在你面前的就是启始画面,该画面功能就是问候你及本公司业绩照片.还有一个功能健,上写有”到主画面”.你按下该键即可进入主画面.还有一种进入各画面的方法,就是请触摸”菜单”键,即可出现f a s t s e l e c t i o n画面中文意思是快速选择画面.上有八个键你按哪个键即可进入那个键上所写的画面,你按下”到主画面”键就也进入主画面.当然你要再按一下”菜单”键屏幕即可恢复. 3.2进入主画面后你就可以看到眼花缭乱的画面,没关系介绍后你很快就会明白 该画面是全部画面的中心,从它基本上可以监测到电炉的所有状态,报警信息及各种数据,并设定各种数据及控制油泵启停.又从它可以快速的进入到其它画面,并可快速返回.是设备运行中始终打开的画面. 1)首先是左上部分:写有”炉体动作态”下面有诺干个红色长方 块主要是用来监视设备动作上写有炉体和设备的各种状态的. 当炉体和设备改变时它就会呈现出绿色并告诉你现处于的状态. 列如1#电极没到顶时显示紫红色写有”1#电极状态”,当到顶 时就呈现出绿色,并告诉你”1#电极到顶”. 2)中间上部分:写有”分合闸显示”,”档位显示”,当高压柜处 于分闸状态时显示绿色灯及告诉你以分闸,当处于合闸状态时 显示红灯,及告诉你高压以合.档位显示是告诉你目前变压器所 处在的档位位置,如在2档就在一个黄灯上显示”2档”. 3)右上部分:写有”故障报警”,这部分是显示你的设备发生了故 障并告诉你是什么故障,是否跳闸,如发生了重瓦斯,这时就会 呈现出红色写的”重瓦斯”.并提示你跳闸.如故障消除按下消 警按钮即可恢复. 4)中间靠左部分:是弧压显示,非灵敏度设定及显示功能.三个绿 色棒图分别显示三相电极的弧压,最左边有刻度指示0V-300V 绿色填充到达哪个刻度该相电压就是那个刻度表示的电压.该 棒图的顶端也有数字显示时实弧压值.紫色棒图是显示非灵敏 度的大小,旁边有一刻度0-20,和一个数字键是用来设定非灵
步科编程软件使用手册
.. 入门阶 一、软件安装 1.手册中术语介绍 2.使用软件注意事项 1).kinco HMIware 只能向下兼容不向上兼容,即低版本打不开高版本。 2)使用工程密码保护、上传密码和反编译密码,请务必牢记密码步科公司不提供恢复出厂设置。 3.软件简介 kinco HMIware组态编辑软件(以下简称kinco HMIware)是上海步科自动股份有限公司的。 4.使用步骤 5.软件运行安装要求
1)使用win7操作系统时不要将软件安装在C盘(系统盘) 2)使用win7打开软件时必须右键图标,以管理员身份登录; . 资料Word .. 6.语言切换 ‘选项'--- “语言切换”—“简体中文” https://www.360docs.net/doc/526107046.html,驱动 USB驱动只能手动安装不能自动安装。必须采用以下步骤进行安装。 1)用USB连接触摸屏USB口与电脑USB口; 2)PC弹出“硬件更新向导”---从列表或制定位置安装—下一步---单机浏览---kincoware 中的drive 驱动。 二、制作工程 1.新建工程
2.在通讯连接中选择设备的通讯方式从元件窗口拖拽通讯方式:(客户要求我们的设备是要走以太网的)。所以根据IP分配,触摸屏地址为(192.168.1.143) . 资料Word .. PLC选择、触摸屏(全部在左侧元件列表中寻找)3. 4.通讯连接
5.触摸屏组态画面设计 . 资料Word .. 6.更改背景属性颜色
1.在当前页面空白处双击—弹出窗口属性对话框—更改背景颜色---选择自定义颜色 7.添加文字 . 资料Word .. 8.打开非kinco DTOOLs制作的工程 打开KINCO HMIWARE的工程,方法如下图,不是所有的kinco HMIware 文件都能打开
步科触摸屏
触摸屏培训教程 人机界面是在操作人员和机器设备之间做双向沟通的桥梁,用户可以自由的组合文字、按钮、图形、数字等来处理或监控管理及应付随时可能变化信息的多功能显示屏幕。随着机械设备的飞速发展,以往的操作界面需由熟练的操作员才能操作,而且操作困难,无法提高工作效率。但是使用人机界面能够明确指示并告知操作员机器设备目前的状况,使操作变的简单生动,并且可以减少操作上的失误,即使是新手也可以很轻松的操作整个机器设备。使用人机界面还可以使机器的配线标准化、简单化,同时也能减少PLC 控制器所需的I/O 点数,降低生产的成本同时由于面板控制的小型化及高性能,相对的提高了整套设备的附加价值。 触摸屏作为一种新型的人机界面,从一出现就受到关注,它的简单易用,强大的功能及优异的 稳定性使它非常适合用于工业环境,甚至可以用于日常生活之中,应用非常广泛,比如:自动化停车设备、自动洗车机、天车升降控制、生产线监控等,甚至可用于智能大厦管理、会议室声光控制、温度调整。 随着科技的飞速发展,越来越多的机器与现场操作都趋向于使用人机界面, PLC 控制器强大的 功能及复杂的数据处理也呼唤一种功能与之匹配而操作又简便的人机的出现,触摸屏的应运而生无疑是21 世纪自动化领域里的一个巨大的革新。 制作一个最简单的工程 “使用便捷”是EV5000 组态软件的最大优点。在这里我们将通过演示制作一个只包含一个 开关控制元件的工程来说明EV5000 工程的简单制作方法,以此作为本书的开始。而其它元件的 制作方法和这个开关的制作方法基本上类似。 2.1 第一步 首先,我们来创建一个新的空白的工程 1. 安装好EV5000 软件后,在[开始]/[程序]/[Stepservo]/[EV5000]下找到相应的可执行程序 点击。 2. 这时将弹出如下画面:
变频器设定使用
变频器参数设定 近期变频器使用较频繁,现将常用品牌变频器参数整理规范,如无特殊情况,请按下列参数进行设定(以3P AC380V 50Hz 6极15kW 电机为例)。 施耐德变频器参数设定(ATV71系列) 简单起动(SIM): bFr(标准电机频率):50Hz nPr(电机额定功率):15kW(参照电机铭牌设定)UnS(电机额定电压):380V(参照电机铭牌设定)nCr(电机额定电流):31.4A(参照电机铭牌设定)FrS(电机额定频率):50Hz(参照电机铭牌设定)nSP(电机额定速度):970rpm(参照电机铭牌设定)tUn(自整定):请求自整定并完成 PHr(改变输出相序):改变电机旋转方向(电机反转时进行设定)ACC(加速时间):30s dEC(减速时间):45s LSP(低速频率):10Hz HSP(高速频率):50Hz 设置(Set-): Ftd(电机频率阈值):40Hz 输入/输出设置(I-O-): rI-(R1设置):FtA(频率达到) r2-(R2设置):rUn(变频器运行) AO1-(AO1设置):OFr(电机频率)使用频率表AO1t(AO1类型):10V(10V电压)使用频率表 命令(CtL-):通过导航按钮调速,如用电位器调速则不用设该参数FrI(给定1通道):LCC(图形终端) CHCF(组合模式):SEP(隔离通道) CdI(命令通道1设置):tEr(端子排) Rln(反向禁止):Yes(是) 出厂设置(FCS-): GFS(回到出厂设置):YES(常规下不使用该功能)
施耐德变频器参数设定(ATV312系列) bFr(标准电机频率):50Hz FrI(给定1通道):AI1 设置(Set-): ACC(加速时间):30s dEC(减速时间):45s LSP(低速频率):10Hz HSP(高速频率):50Hz Ftd(电机频率阈值):40Hz 电机控制(drc-): UnS(电机额定电压):380V(参照电机铭牌设定)FrS(电机额定频率):50Hz(参照电机铭牌设定)nCr(电机额定电流):31.4A(参照电机铭牌设定)nSP(电机额定速度):970rpm(参照电机铭牌设定)tUn(自整定):请求自整定并完成 输入/输出设置(I-O-): Do-(模拟/逻辑输出):Ofr(电机频率) rI-(R1设置):FtA(频率达到) r2-(R2设置):rUn(变频器运行) 命令(CtL-): LAC(访问等级):L3 CHCF(组合模式):SEP(隔离通道) CdI(命令通道1设置):tEr(端子排)
威纶通触摸屏通讯说明书
威纶通触摸屏通讯说明 重置系统为出厂设定 当使用新的触摸屏时必须重新设置触摸屏部的各种密码。 方法:1.将触摸屏后的止拔开关DIP1,DIP2,DIP3,DIP4(打开触摸屏后盖即可看到相应的标识)对照说明书进行相应的操作。即将DIP Switch 1设置为ON,其余DIP2,DIP3,DIP4Switch保持为OFF 2.给MT8000重新上电此时MT8000会先切换至屏幕触控校正模式,在完成校正动作 后会弹出一个对话窗口如下图。此对话窗口将询问使用者是否将MT8000的系统设定密码恢复为出厂设定,若为是则选定YES即可,反之则选择NO 当选择为YES后,会弹出另一个对话窗口,如下图。此对话窗口将再次确认使用者是否要将MT6000的系统设定密码恢复为出厂设定,并且要求使用者输入YES做为确认,在完成输入后按下OK即可。 3.关闭触摸屏,将其后的止拔开关按照说明书扳到指定位置。(MT6000系列出厂时的系统预设密码为111111,但必须重设其它密码,包括download与upload所使用的密码皆需重设。) 注意:当进行MT8000的重置动作时,触摸屏的画面程序以及所储存的历史资料将全部被清除。 4.开机重新设置各种密码
Local Password 进入系统设定时所需的密码 Upload Password 上传画面程序时所需的密码 Download Password 下载画面程序时所需的密码 Upload (History) Password 上传取样数据与事件纪录档案时所需的密码。 以下为触摸屏USB驱动程序安装说明: 1、选择第二选项“从列表或指定位置安装(高级)”,并按下“下一步”。